Colony Flow Level 155 Walkthrough Solution & Guides | How to solve Colony Flow 155

Guide By Liam Stone
Updated on July 16, 2026
The article below explains Level 155 in detail, but the video above gets you there faster.
Video doesn't match your screen?
Game updates frequently scramble layouts! Try our AI Screenshot Solver first to find your exact board instantly, or report broken guides to our team.
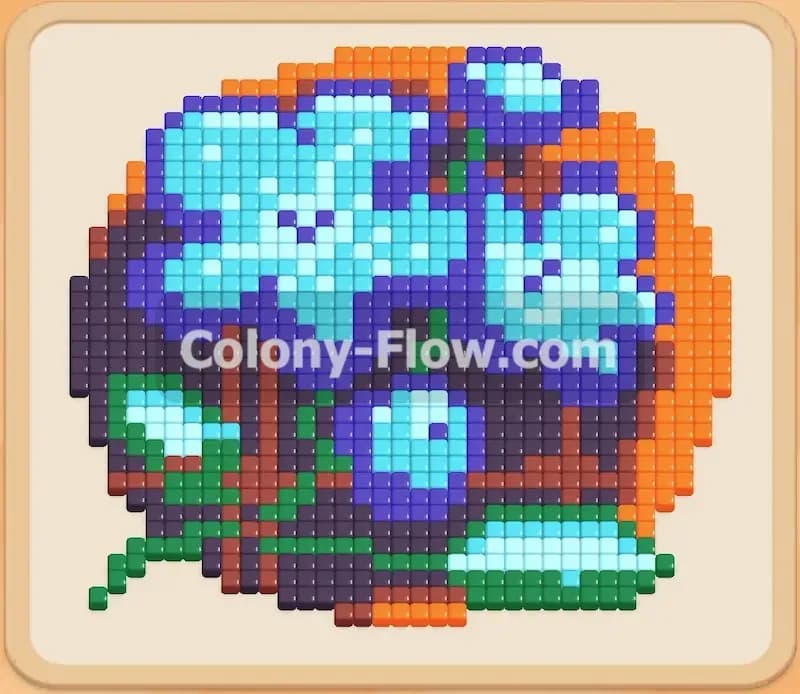
Colony Flow Level 155 presents a beautiful pixel art portrait that you must clear away piece by piece. This puzzle tests your patience and timing because the layers of colors overlap in ways that can easily block your ants from reaching their targets. You have to peel back the outer edges before you dive into the center details. I found that managing the waiting slots is the real trick here because you cannot just tap blocks and hope for the best.
Colony Flow Level 155 Overview
What You Are Working With
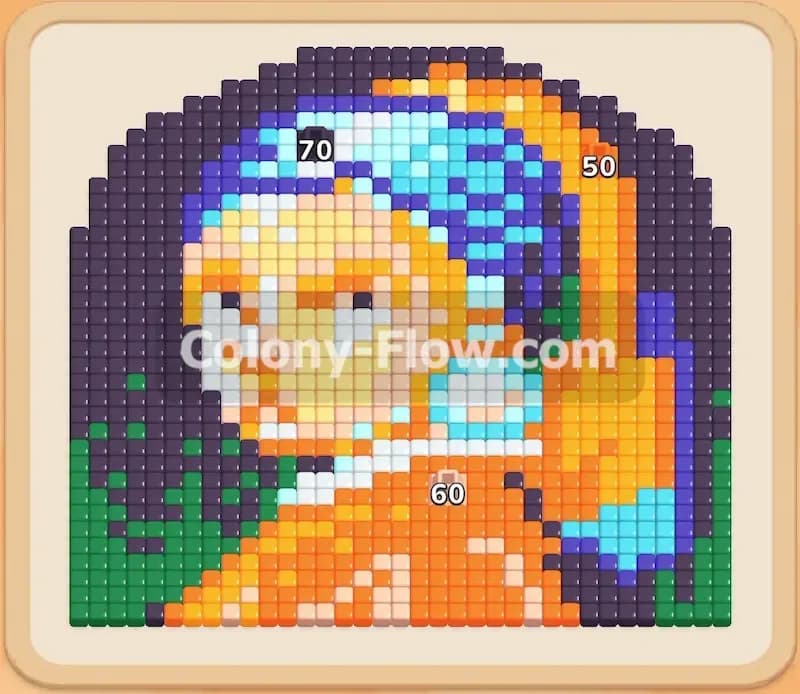
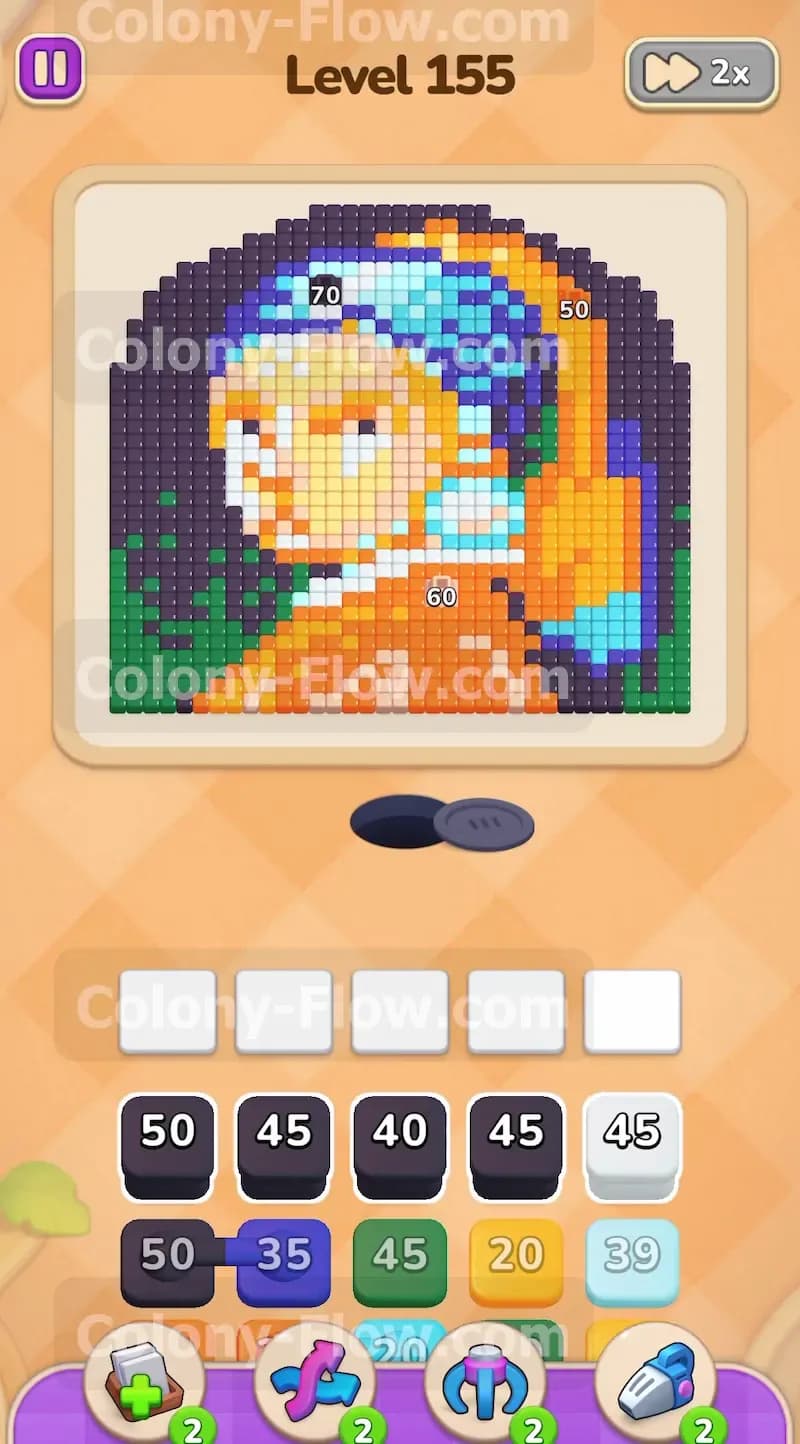
The board features a large portrait made of several distinct color zones. You will see a massive dark grey background surrounding the figure on the left and top edges. The figure wears a bright orange dress on the lower right and a head wrap made of light blue and yellow tiles. The face consists of beige and white tiles right in the center. Down the lower left side you will notice a section of green tiles that look like a plant pattern. In your tray at the bottom of the screen you have single blocks and several connected boxes. These connected boxes link two colors together with a thick line. Tapping them moves both blocks into the waiting slots at the exact same time. You have to be very careful with these connected sets because they take up two of your five slots instantly.
What It Takes to Clear Level 155 Board
Winning this level means clearing every single pixel art tile from the screen without jamming your five waiting slots. You will send out streams of ants to eat away the dark grey background first because it blocks the safe paths to the inner colors. Then you will work your way through the orange dress and the light blue head wrap. The final phase involves clearing the small face details and the remaining green and purple accents. You must always ensure that at least one block in your waiting slots corresponds to a completely open path on the board. If you fill all five slots with colors that the ants cannot reach yet you lose the level immediately.
Colony Flow Level 155 Step by Step Solution
Step 1: Clear the outer dark grey background to open the main paths.
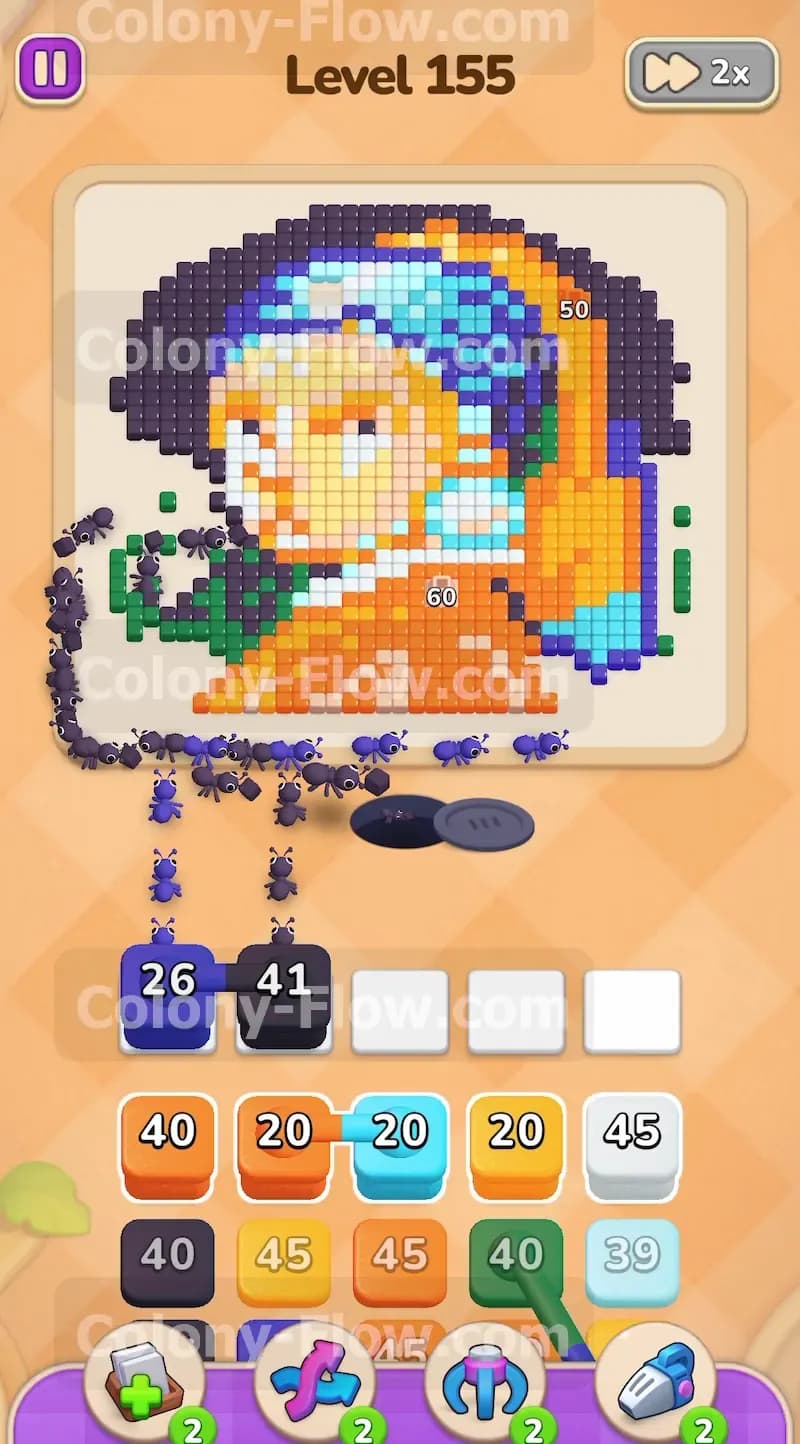
When you start the level the dark grey tiles wrap around the entire left and top sides of the portrait. The ants need access to the inner colors but this thick dark border stands directly in the way. Look at your tray and pull the large dark grey blocks into your waiting slots. You will see a dark grey 50 block and a dark grey 45 block ready to go. Tap them to send them up. The ants will immediately stream out of the nest hole at the bottom center and start eating the background starting from the bottom left and moving upward. You will see them form a long dark line across the beige floor of the board. This is a very safe opening move because the dark grey tiles are completely exposed on the outer edge. The numbers on your blocks will count down quickly as the long line of ants goes to work. Keep an eye on the waiting slots while this happens. You want these large blocks to clear out entirely before you bring in any new colors.
Step 2: Bring in purple and white to chip away at the top and the face.
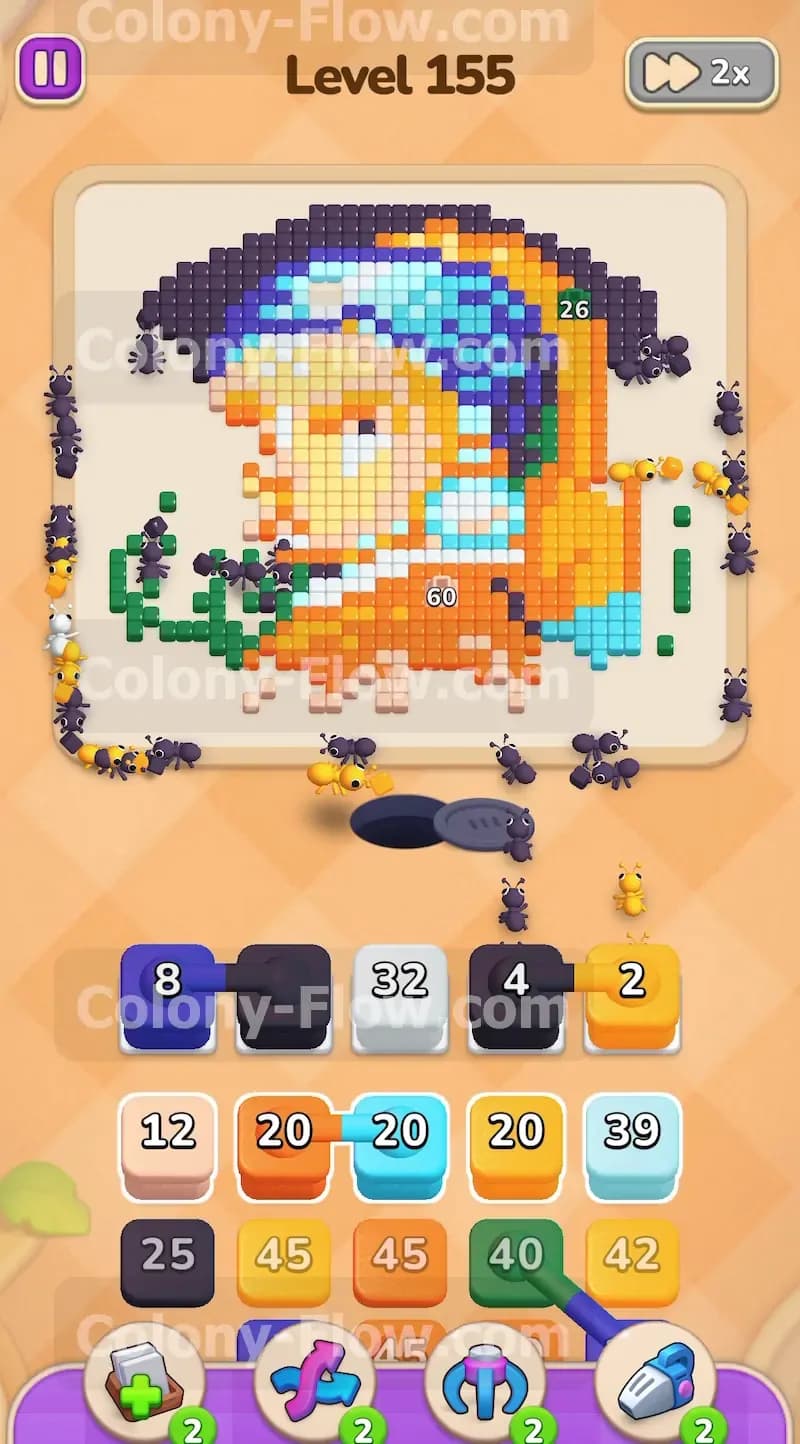
Once the dark grey blocks shrink down and free up an empty slot you can introduce the next layers. The dark grey clearing has exposed the edges of the purple shadows at the top left and the white tiles on the face. Pull a purple block and a white block from the tray. I recommend pulling the white 45 block and the purple 35 block. The ants will naturally split their focus into two groups. One group will head up the left side to eat the purple tiles while another group finds a path straight up the middle to the white portion of the face. This dual attack keeps the flow moving smoothly. By targeting the top and the center at the exact same time you ensure that your waiting slots empty out at a steady pace. Never pull a third color until one of these active blocks finishes its countdown.
Step 3: Target the orange dress at the bottom right.
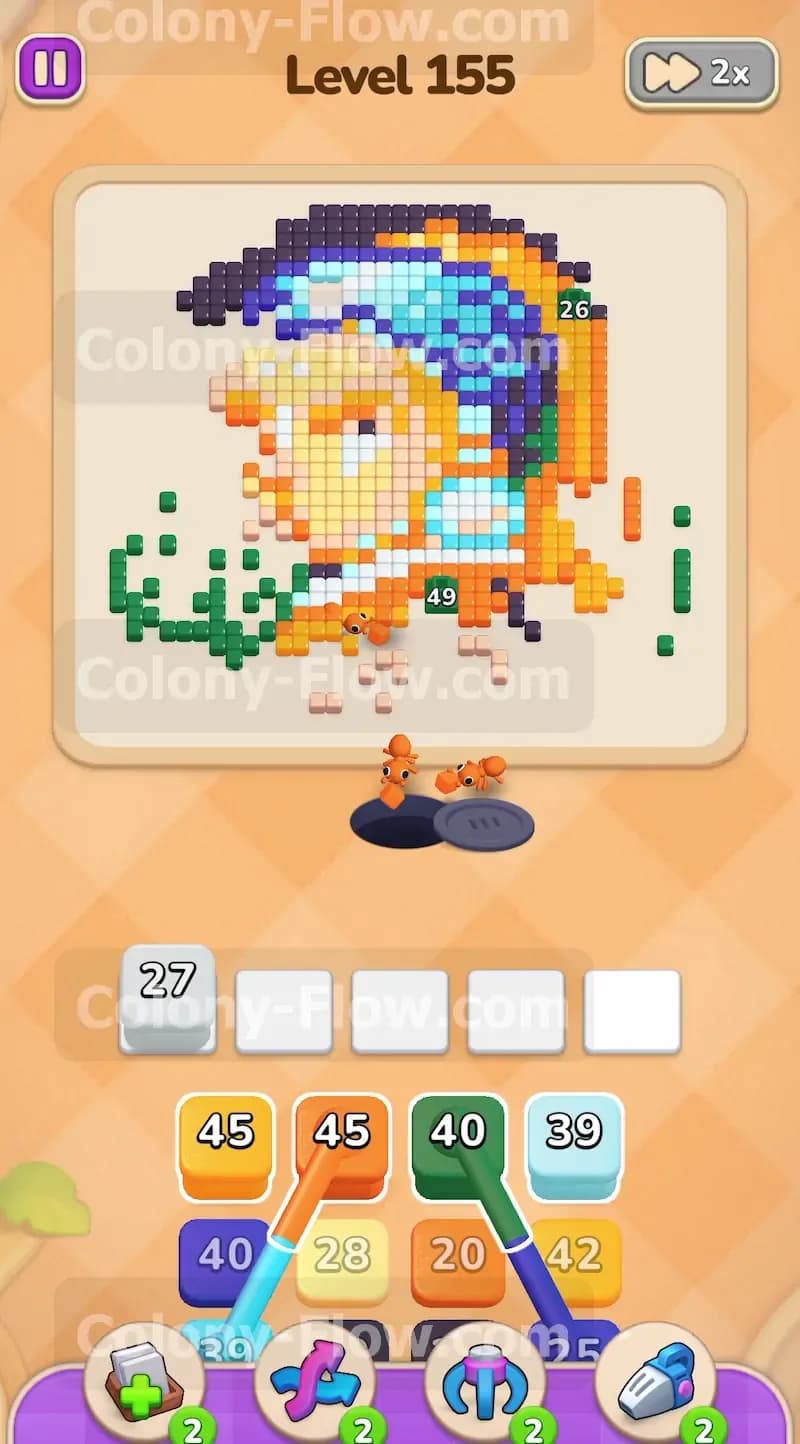
With the top left and center starting to clear you will notice the bright orange dress taking up the lower right quadrant. The path to the orange tiles is wide open right from the nest hole. Tap an orange 40 block and an orange 20 block to send them to the waiting slots. The ants will form a thick solid column heading right from the nest hole. They will swarm the bottom edge of the dress and slowly eat their way up towards the shoulder area. The dress is a huge block of pure color so these numbers will drop very fast. Quick clears keep your slots safe from jamming. While the orange clears you will see more of the blue and yellow head wrap become accessible from the bottom edge. Resist the urge to pull blue or yellow blocks right now. Let the orange blocks finish their job first to keep your board state clean and your slots open.
Step 4: Handle the connected green and light blue boxes.
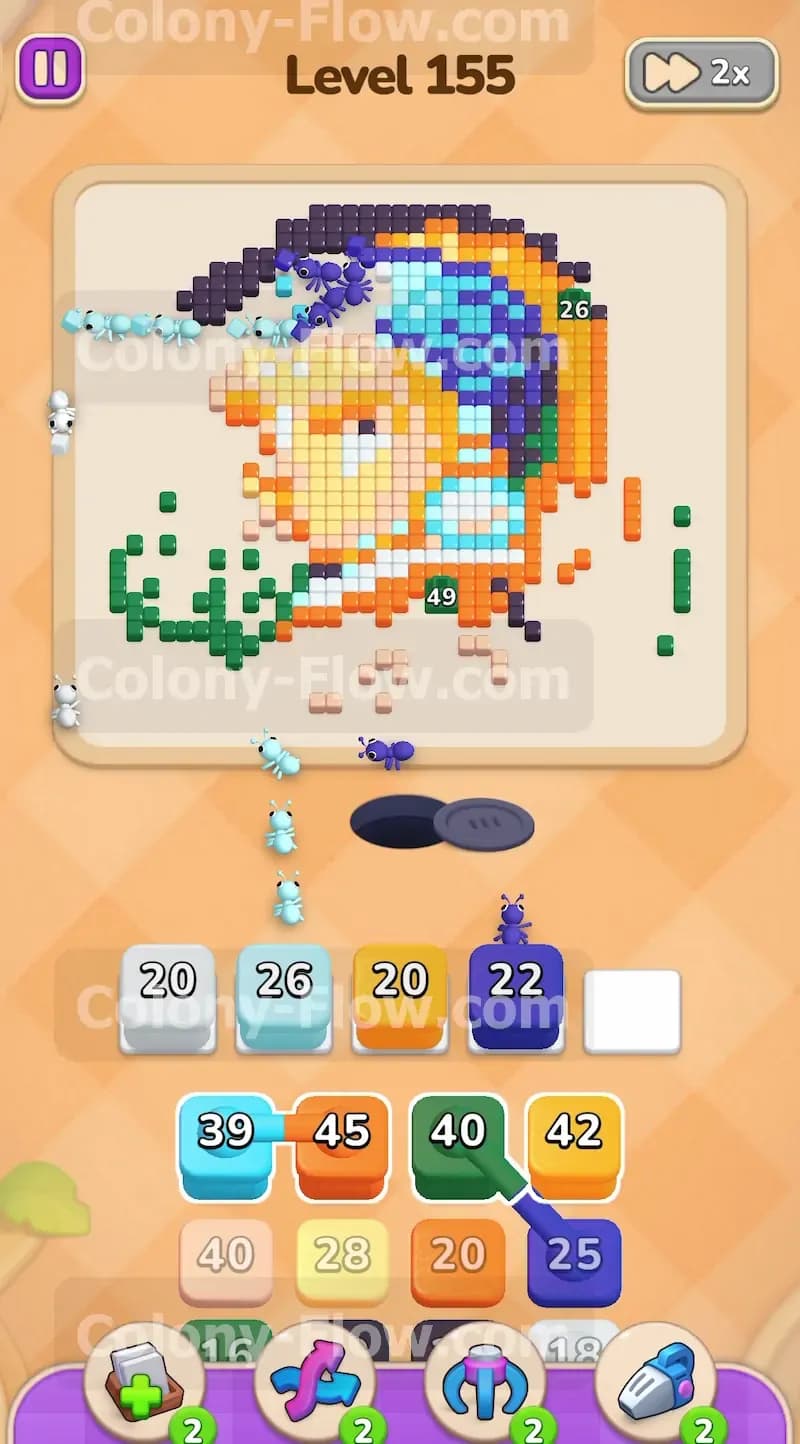
Now you face a tricky mechanic in the tray. You will see a green block and a light blue block linked together as connected boxes in the tray. Tapping either one brings them both into your waiting slots simultaneously. Before you make this move you must look at the board to confirm that both colors have completely open paths. The green tiles on the lower left side are fully exposed thanks to your early work on the dark grey background. The light blue tiles on the head wrap are also open now that the orange dress has shrunk. Tap the connected boxes to pull them up. The ants will immediately divide into two groups. Half will march left to clear the green foliage pattern. The other half will climb up the right side past the orange dress to tackle the light blue head wrap. Because both paths are completely open neither block will sit idle in your slots. They will both count down and vanish.
Step 5: Clear the yellow band on the head wrap.
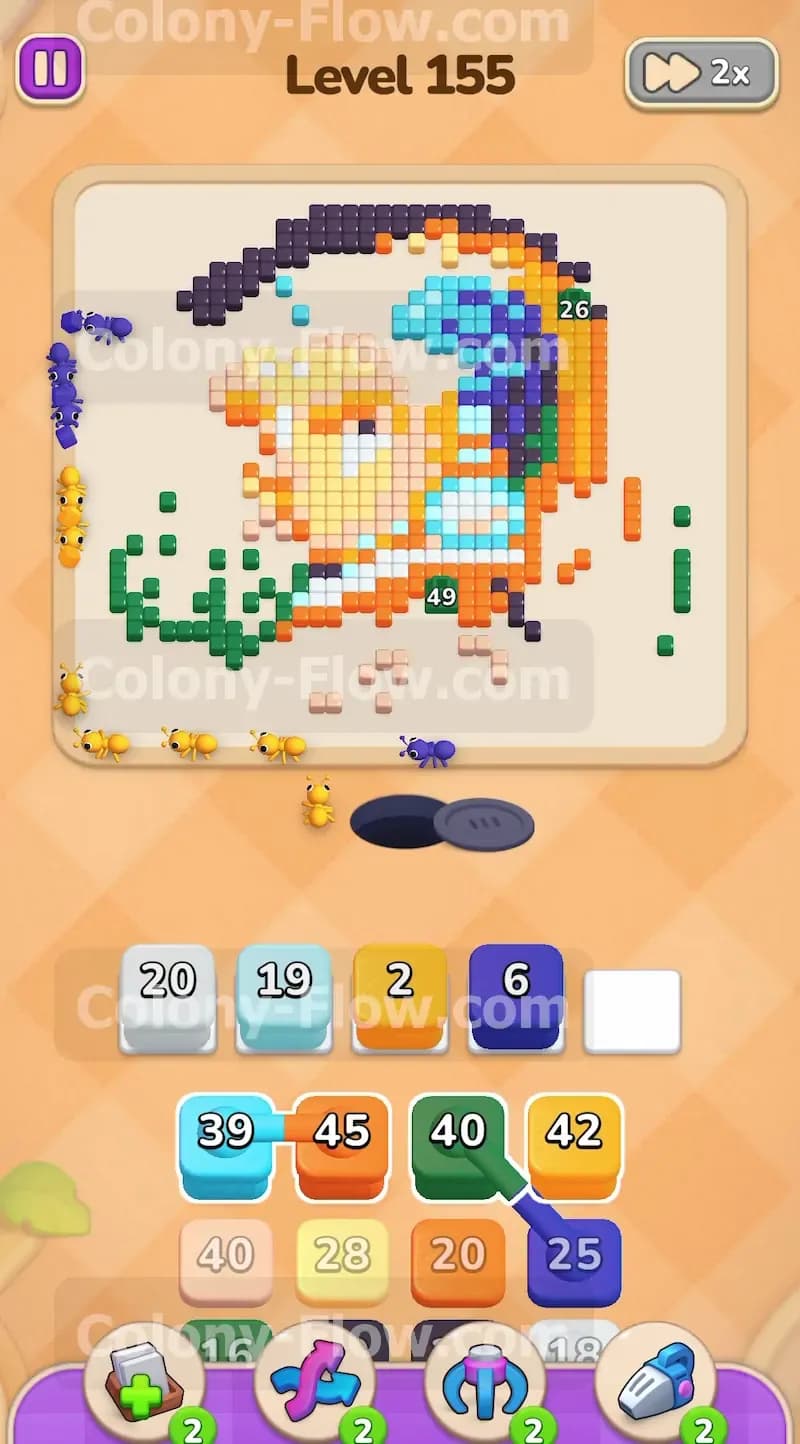
As the light blue tiles vanish they expose the thick yellow band wrapping around the head. This band is a crucial barrier blocking the final purple and dark grey tiles near the top and back of the head. Pull a yellow 45 block from the tray. The ants have a direct route right up the right side of the board to reach the yellow tiles. You will watch the yellow block count down steadily. If you have an empty slot you can also pull a beige block to continue working on the face. The beige tiles sit right next to the white ones you cleared earlier. The ants will easily find their way up the middle to the face without disrupting the line heading for the yellow band on the right.
Step 6: Use another set of connected boxes for green and yellow.
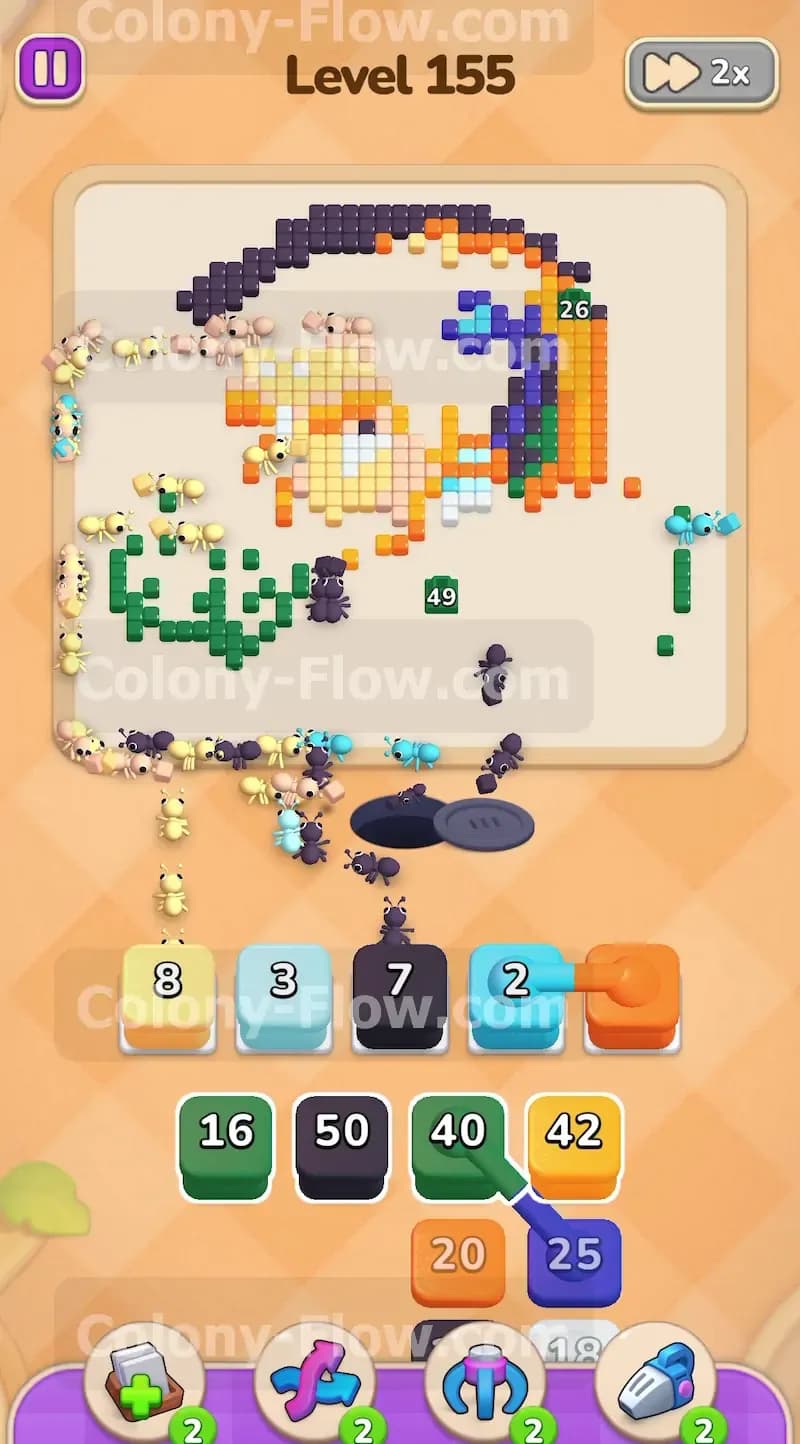
Your tray presents another pair of connected boxes a bit later. This time it links a green block and a yellow block. You just opened up the rest of the yellow band and the green foliage still has some tiles left to clear on the left side. Tap these connected boxes to bring them to the waiting area. Just like before the ants will split into two efficient streams. The left side handles the green while the right path handles the yellow. This move clears out a massive chunk of the middle board. The picture will really start to look empty at this point. The key to winning here is that you waited until the first yellow block finished before pulling this connected set. Patience strictly prevents the waiting slots from clogging up and ruining your run.
Step 7: Clean up the remaining light blue and purple details.
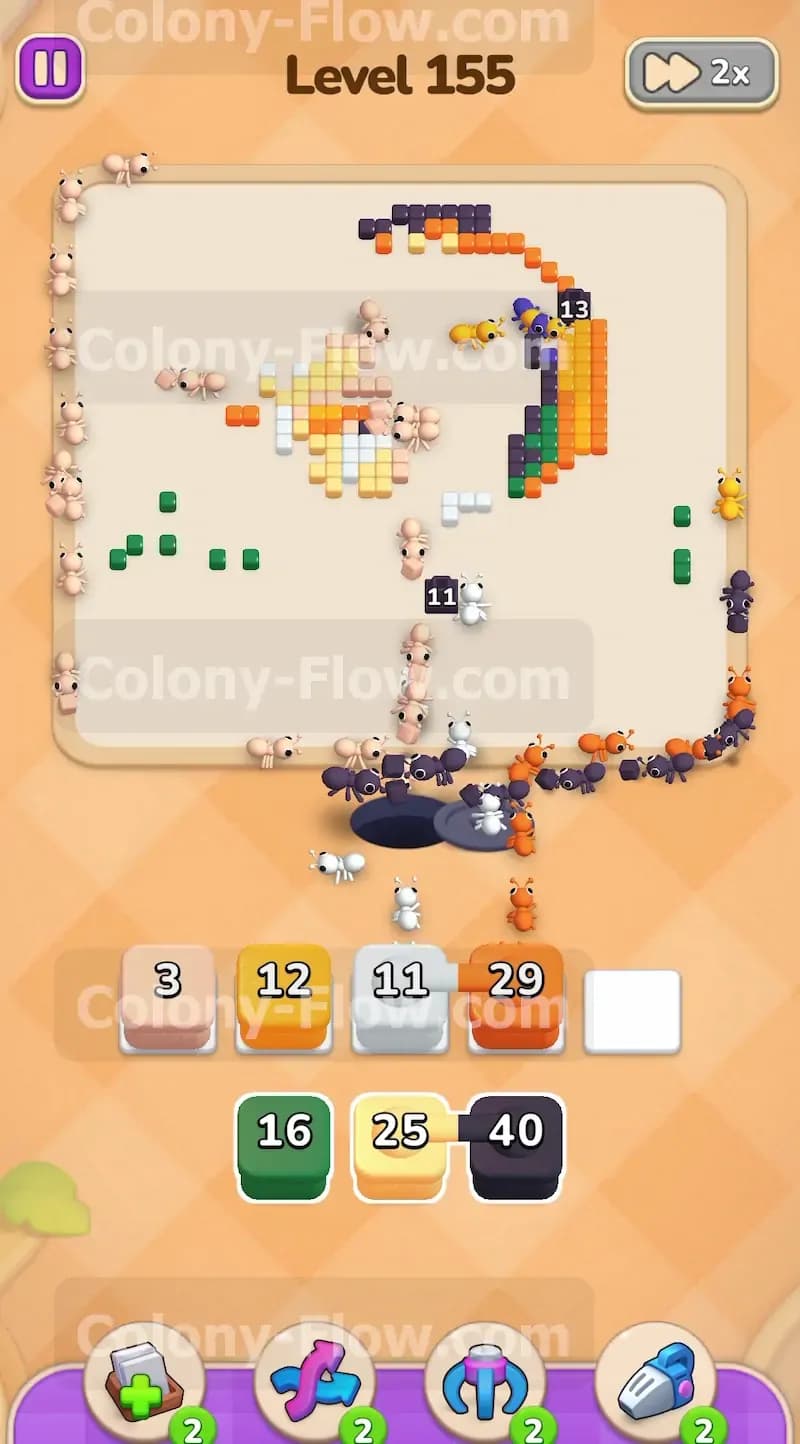
The head wrap still has some scattered light blue tiles and there are stubborn purple sections at the very top. Pull a light blue block and a purple block into your slots. The board is very open now so the ants have zero trouble navigating across the large empty spaces. They will march up the right side and the far left side to eat these remaining color pieces. You will notice the portrait is almost entirely gone. Only a few small clusters of face details and background colors remain. Let these blocks hit zero before you look at your final tray options. You are very close to the end and you definitely do not want to make a careless mistake by filling your slots with the wrong colors right now.
Step 8: Finish the face with beige and white blocks.
The center of the board holds the last pieces of the face. You have a beige block and a white block left in your tray. Tap them both to send them up. The ants will flood the middle and erase the final facial features. These numbers are sometimes larger than the remaining tiles on the board but that is perfectly fine. The game automatically adjusts and clears the blocks once the corresponding color is completely gone from the picture. Watch the ants swarm the center area. The face will disappear completely leaving only a tiny handful of tiles scattered on the far outer edges of the screen.
Step 9: Dispatch the final blocks to win the level.
You are down to the very last few tiles. The board has a couple of orange spots a tiny bit of yellow and maybe one or two dark grey pixels. Your tray has the exact blocks needed to finish the job. Pull your remaining orange yellow and dark grey blocks into the waiting slots. Since the board is completely empty of obstacles the ants will sprint straight across the open board to reach the final tiles. They will gobble up the last bits of the dress the end of the head wrap and the final background pixel hiding in the corner. The blocks in your slots will vanish quickly. The game will recognize that the board is completely clear. You have successfully beaten the level and you can move on.
Final Thought
This level is a brilliant exercise in managing connected boxes and keeping your board open. By stripping away the outer dark grey layers first you gave your ants the room they needed to tackle the complex overlapping colors of the portrait. If you ever find your ants getting stuck or your waiting slots filling up too fast take a deep breath and slow down your taps. You can always refer to the video above this article if you want to watch exactly how the paths open up in real time.