Colony Flow Level 122 Walkthrough Solution & Guides | How to solve Colony Flow 122

Guide By Liam Stone
Updated on July 11, 2026
Watch the video above for the quick version of the Level 122 walkthrough.
Video doesn't match your screen?
Game updates frequently scramble layouts! Try our AI Screenshot Solver first to find your exact board instantly, or report broken guides to our team.
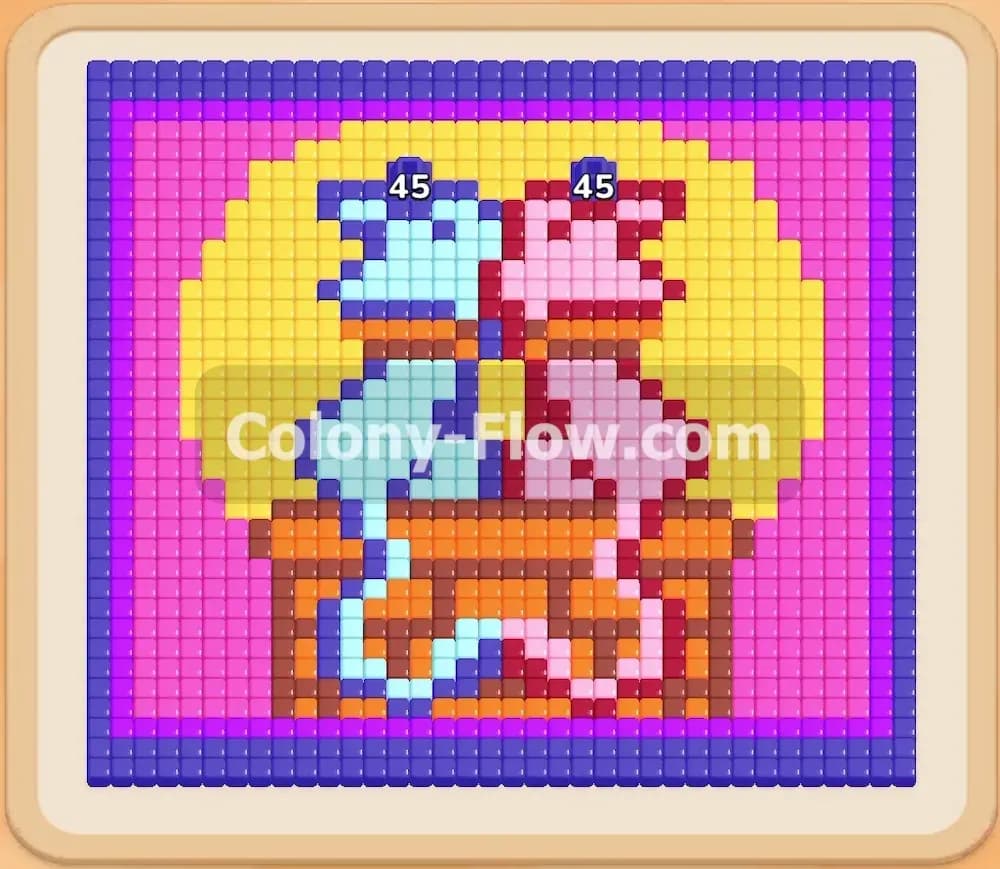
Getting into Colony Flow Level 122 requires immense patience and a very sharp eye for pathing. You face a beautifully detailed pixel art picture featuring two cats sitting together on a brick wall with a massive bright moon glowing behind them. I play every single level myself to figure out the absolute best approach before sharing my methods with you. This particular board throws a lot of high count blocks at you right from the very first move. You need to manage your tray space incredibly carefully to keep the colony moving and avoid filling all your slots. Taking the wrong block at the wrong time will end your run quickly.
Colony Flow Level 122 Overview
What You Are Working With
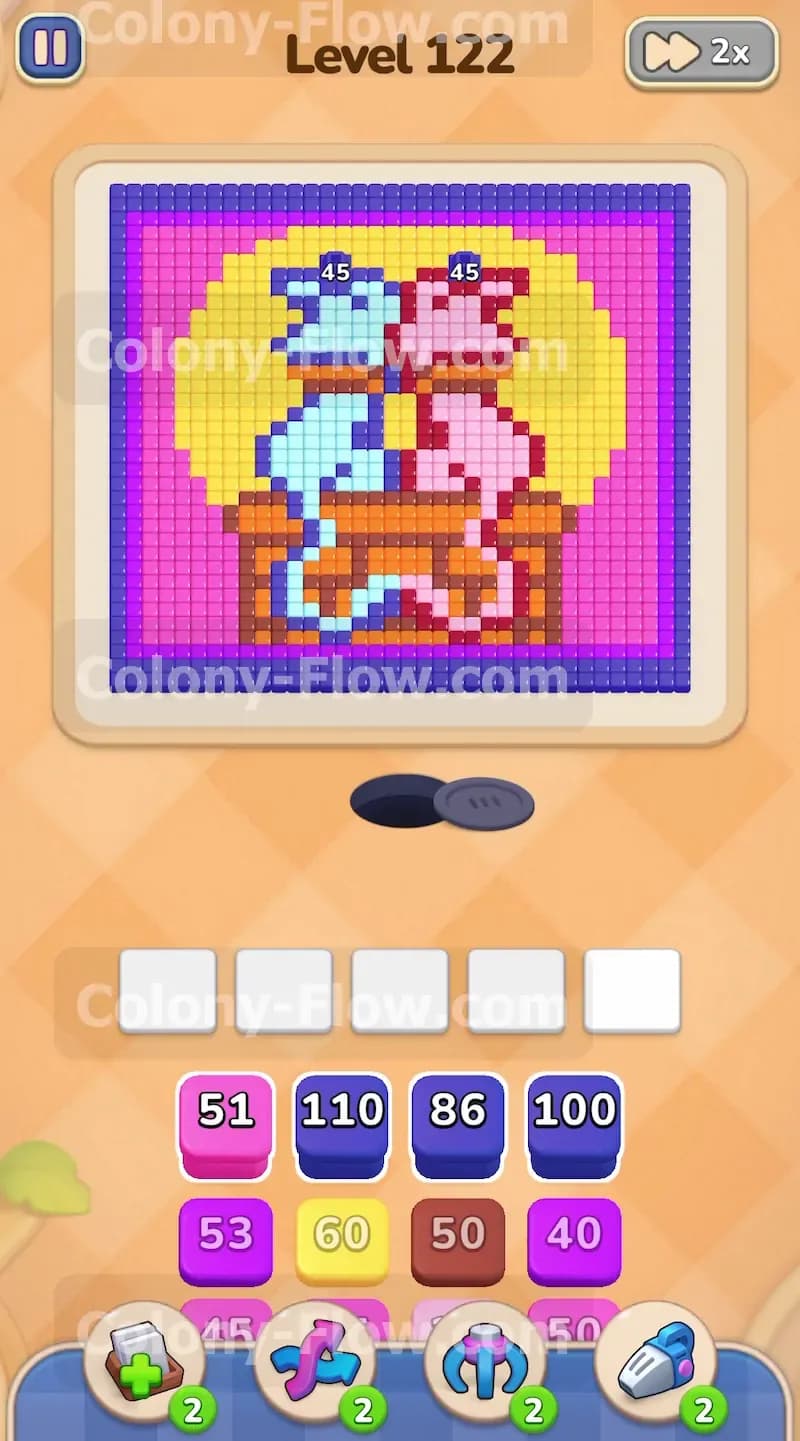
Look at the board layout before making any moves. The top half of your screen displays a large rectangular pixel art picture. The outermost layer is a thick dark purple boundary that wraps entirely around the image. Inside that dark border you see a bright pink sky filling the top corners. A solid brown and orange brick wall runs across the bottom section. Two cats take up the dead center of the image. The cat on the left side is light blue and the cat on the right side is pink. A large round yellow moon sits directly behind the two cats.
Your tray at the bottom of the screen holds the numbered colored blocks you need to feed the colony. The numbers on these initial blocks are unusually large. You will notice a dark blue block with 110, a blue block with 86, and a purple block with 100 sitting right at the top. Below those you have an orange block with 55, a yellow block with 60, and several brown and magenta blocks. These exceptionally high numbers mean the ants will take a substantial amount of time to clear each block from your tray. You must manage your tray perfectly to survive this board.
What It Takes to Clear Level 122 Board
To win the level you must clear every single colored tile from the board. The core rule of the game gives you exactly five waiting slots for your active blocks. If you pull a colored block and the ants cannot reach the matching color on the board that block gets stuck in the tray. If you fill all five waiting slots with stuck blocks and no ants can move you lose the level instantly.
Clearing this board requires a very strict outside to inside approach. You have to peel the picture away layer by layer starting from the absolute edge. The outer dark border must go first to open up the interior. Then you tackle the bright pink background sky and the yellow moon. After the sky is clear you break down the brick wall at the bottom. Finally you clear the two cats in the center. Every single step must keep at least one open path so the colony can continuously flow from the nest hole to the target tiles without ever jamming the board.
Colony Flow Level 122 Step by Step Solution
Step 1: Break open the thick dark outer border to create entry points for the rest of the board
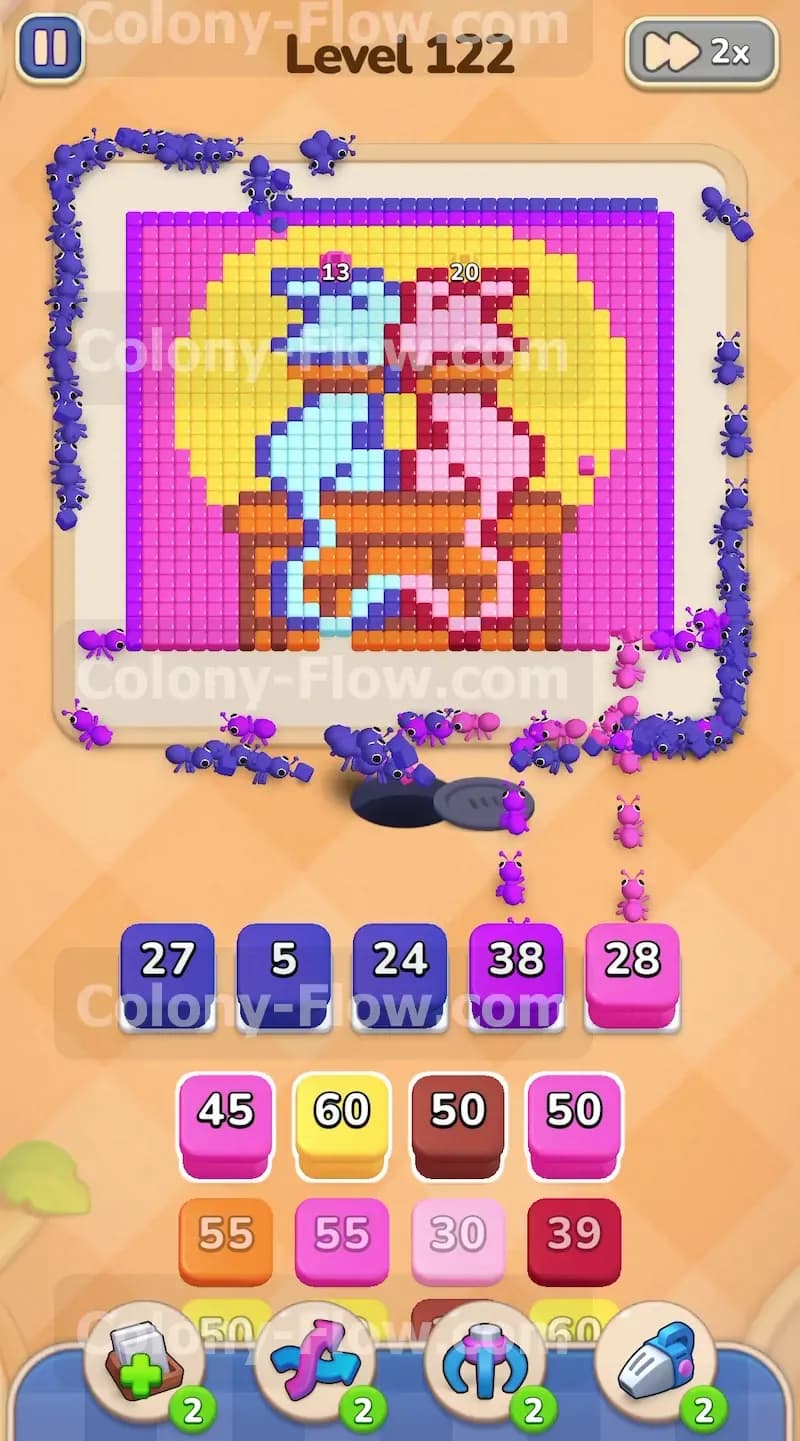
Your immediate priority is the thick dark boundary wrapping around the entire picture. The ants simply cannot reach the pink sky or the yellow moon until you remove this outer shell. Look at your tray and select the dark blue and dark purple blocks. You will see a massive dark blue block with 110 on it and another purple block with 100. Pulling these heavy blocks sends a massive swarm of ants marching out of the nest hole at the bottom of the screen. They immediately split to the left and right sides of the picture. The ants climb up the outer edges and begin eating away the border tiles. Because these blocks have such massive numbers they will occupy your waiting slots for a very long time. You have to monitor your five slots constantly during this phase. Do not pull the yellow or light blue blocks under any circumstances. The yellow moon and the light blue cat are completely enclosed by the outer border and the background sky. If you pull those specific blocks right now they will just sit dead in your tray. They will permanently clog your limited slots and bring you dangerously close to an instant loss. Let the dark blue and purple ants do their job. Watch the numbers on those blocks slowly tick down as the ants consume the entire outer frame.
Step 2: Clear the bright pink background sky from the top corners of the picture
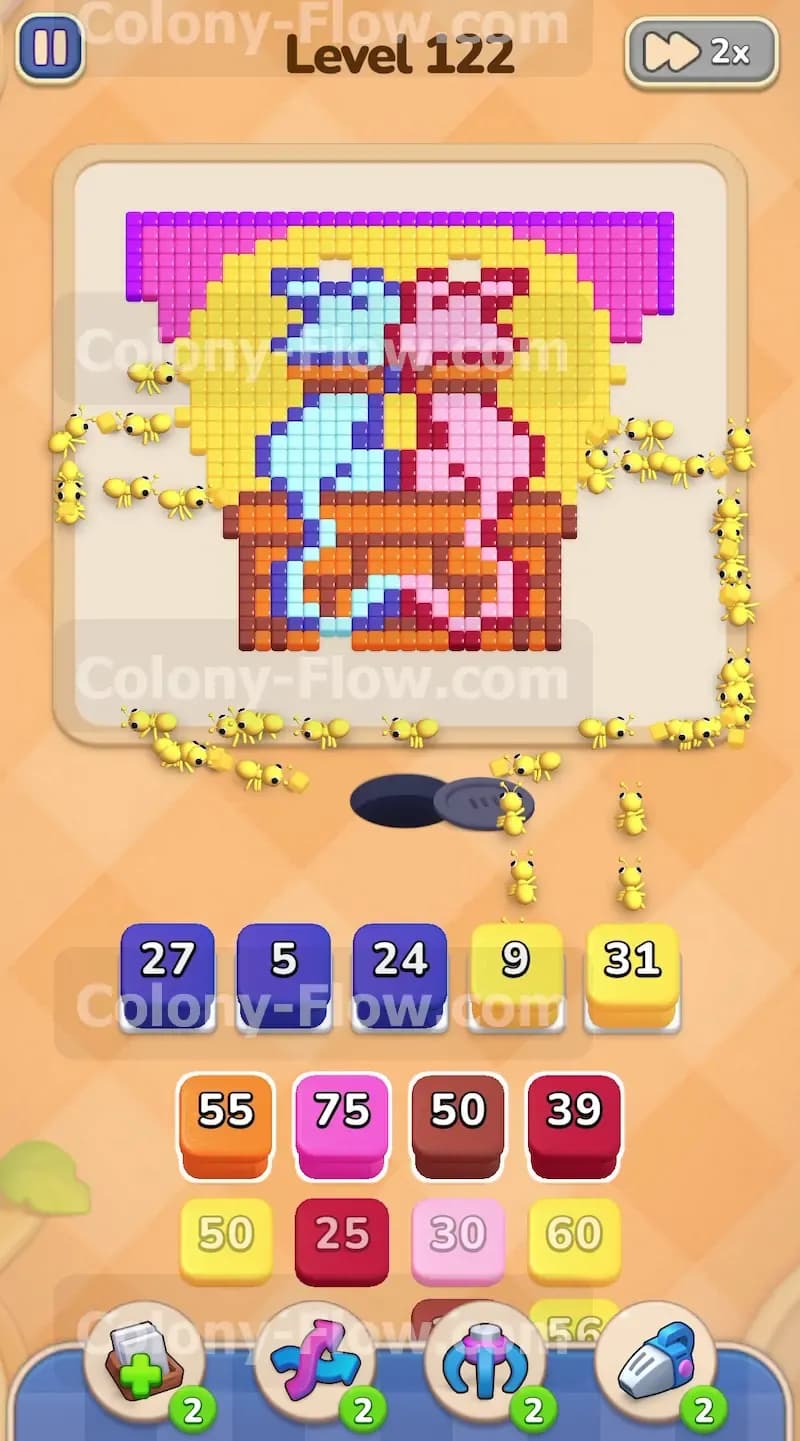
As the dark border slowly disappears the bright pink background becomes fully accessible to the colony. Now you can safely pull the large magenta and pink blocks from your tray. You will see a magenta block with 51 on it ready to go. Drag it up into one of your open waiting slots. A fresh stream of pink ants pours out of the nest hole. They follow the open paths created by the first wave and head straight for the upper corners of the board. Your tray will still contain a few leftover dark blue blocks with very low numbers like 5 or 24. This situation is perfectly normal and expected. The ants working on the dark border will continue to finish up their assigned tiles while the new pink ants tackle the background sky. You waited for a clear physical path before pulling the magenta blocks. The ants flow freely without getting stuck behind obstacles. They quickly sweep across the top section of the board and clear away the entire pink sky. This continuous action reveals the upper edges of the big yellow moon.
Step 3: Sweep away the large round yellow moon sitting directly behind the two cats
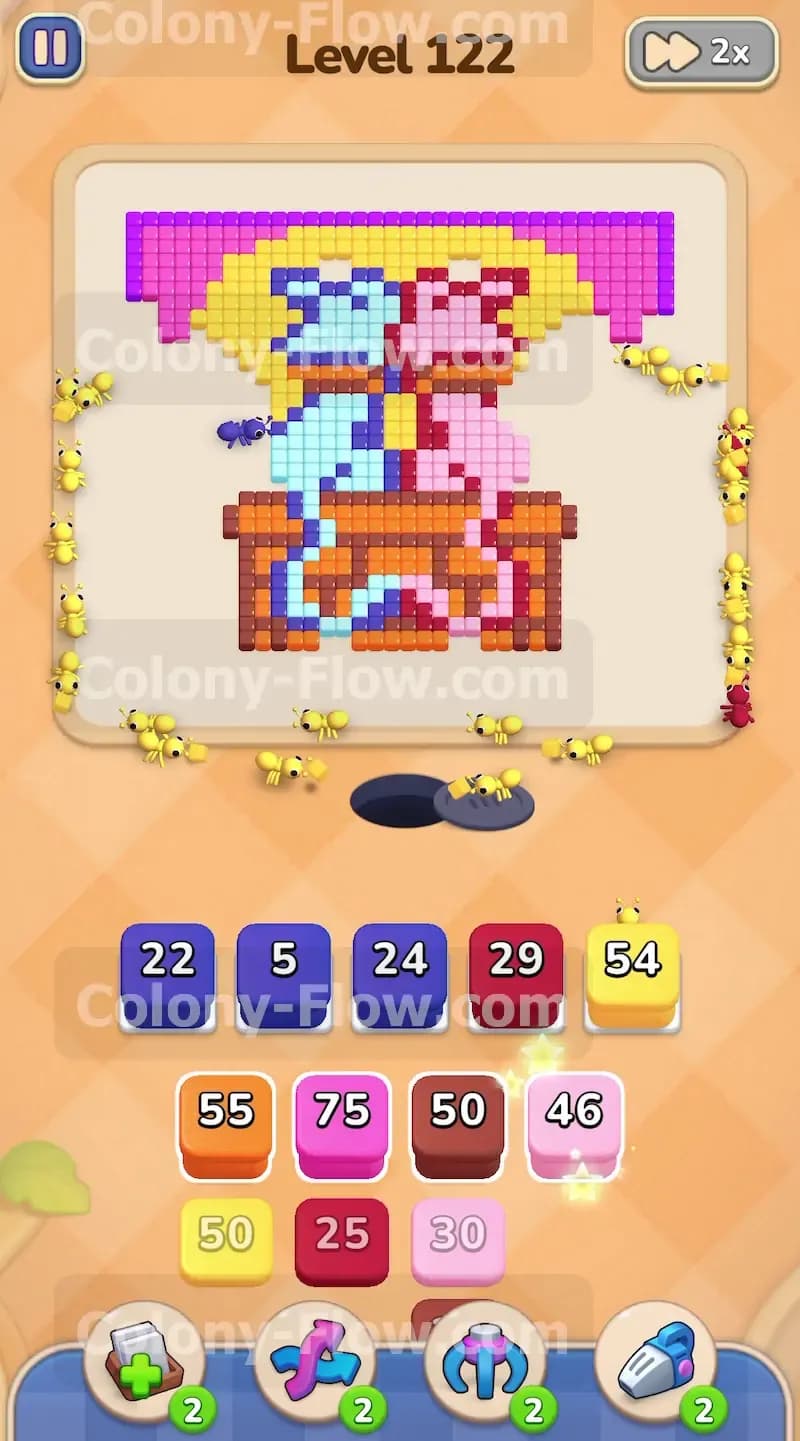
With the pink sky completely gone the yellow moon is now totally exposed on its top and sides. The ants have a massive open surface area to attack. You can now confidently pull the yellow blocks from your tray. Select the yellow block with 60 and drop it into an empty waiting slot. The yellow ants flood the board immediately. They run up the sides of the picture and trace the curved circular outline of the moon sitting just behind the two cats. You must maintain a steady smooth rhythm here. You pull a second yellow block with a number like 31 to keep the momentum going and clear the moon faster. Because the physical path is so wide open the ants continuously stream toward the yellow tiles. The numbers on your yellow blocks drop rapidly. This steady uninterrupted flow is exactly what you want to see. It ensures your tray never jams up with idle blocks. The ants carve away the entire moon structure and leave the two cats standing alone on their brick wall.
Step 4: Dismantle the orange and brown patterned brick wall across the bottom of the screen
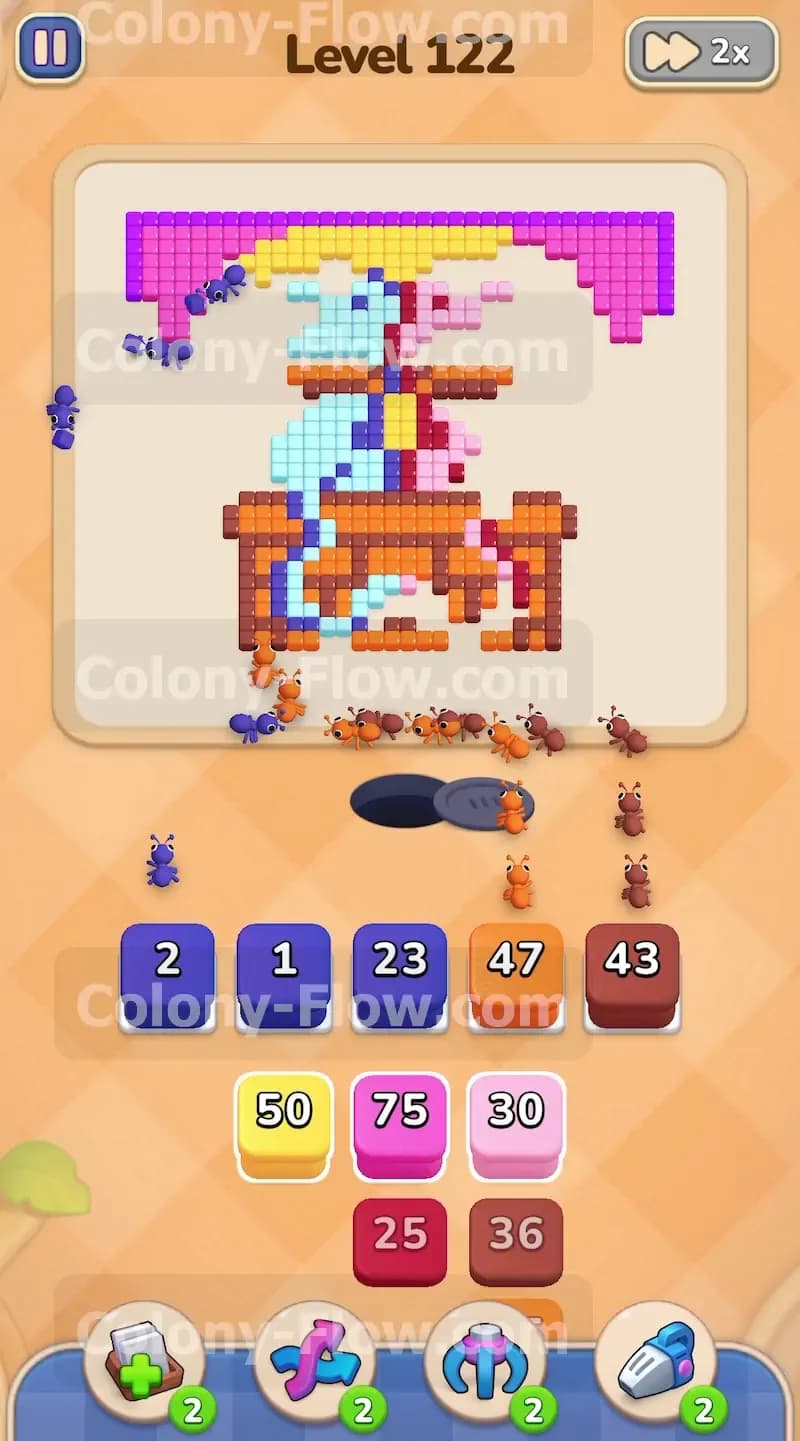
Your next major target is the base of the entire picture. The two cats are sitting on a thick patterned wall made entirely of brown and orange tiles. The ants now have totally clear access to the sides and the top surface of this wall. Look at your remaining tray blocks and pull the orange block with 55 along with the brown block with 50. Orange and brown ants emerge from the dark nest and get right to work on the lower section of the board. The wall contains a very large number of tiles. These heavy brown and orange blocks are absolutely necessary to get the job done properly. You still need to hold off on pulling the main light blue or pink cat blocks. The wall is physically blocking the bottom half of the cats. If you pull the specific cat colors too early you risk jamming your remaining slots right at the very end of the game. Working strictly from the outside toward the inside remains the safest way to play this board. The ants tear down the brick wall piece by exact piece until only the two cats remain suspended in the center of the blank board.
Step 5: Finish the level by completely clearing the light blue and pink cats
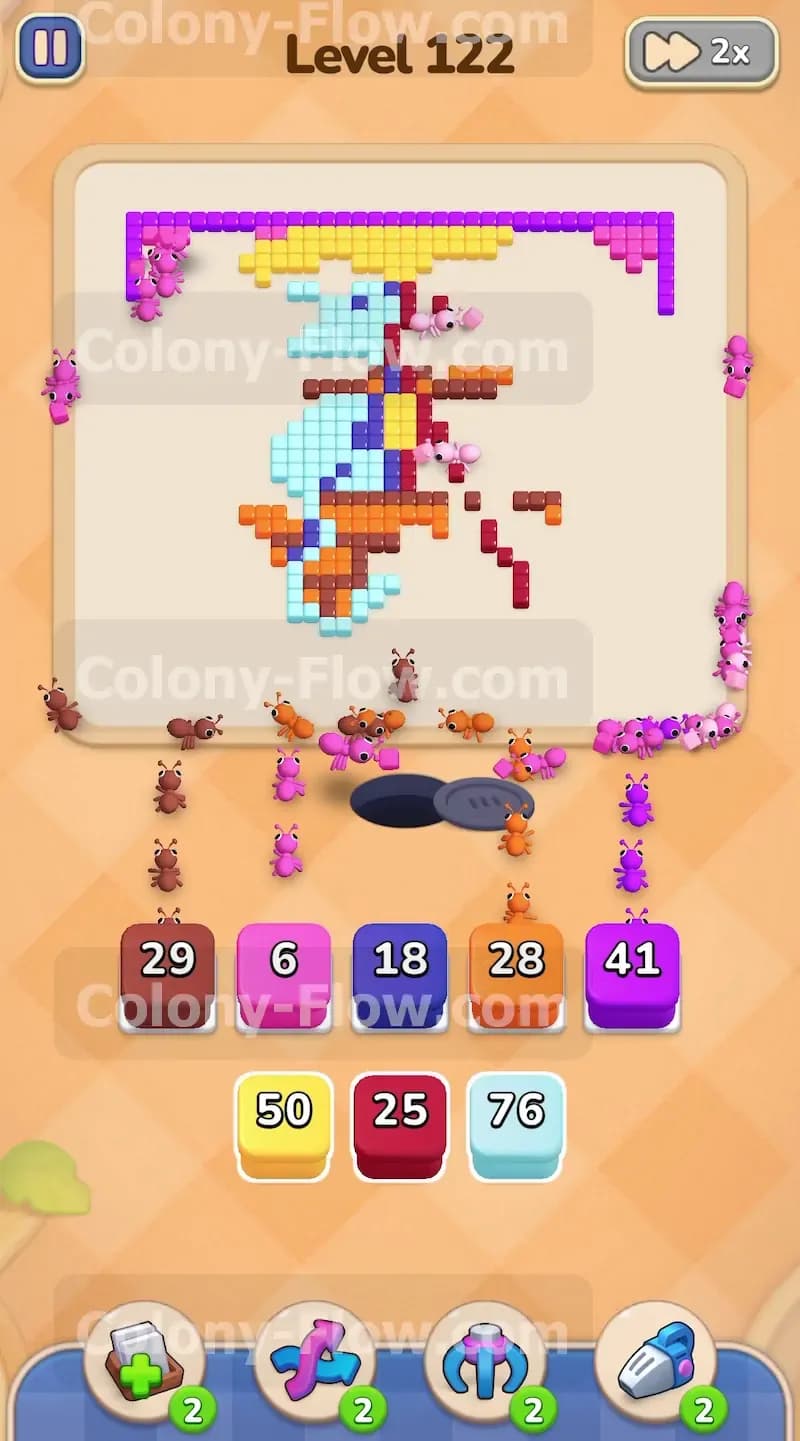
The final phase of the level is extremely straightforward because the board is mostly empty. Only the light blue cat and the pink cat are left standing on the board. They are completely exposed from all possible sides. You can now safely pull the light blue block with 76 and all the remaining pink and dark red blocks from your tray. The final waves of ants rush out and begin dismantling the cats immediately. They attack the remaining tiles from the bottom up and the top down simultaneously. The numbers in your tray drop rapidly to zero one by one. You watch as the final few colored tiles disappear from the screen. The last remaining ants return safely to the nest hole at the bottom. The board clears entirely and the level completes successfully. By actively managing your tray and waiting for clear paths you kept the entire colony flowing and easily avoided filling your waiting slots.
Final Thought
Beating this level is all about intense patience and strict slot management. The massive numbers on the early blocks easily trick players into pulling too many different colors at once. Stick to clearing the outside edges first and deliberately work your way inward layer by layer. If you find any of these specific moves difficult to visualize please watch the video above this article. The gameplay footage shows exactly how the paths open up and exactly how to keep your slots totally clear.