Colony Flow Level 797 Walkthrough Solution & Guides | How to solve Colony Flow 797

Guide By Liam Stone
Updated on August 8, 2026
Watch the video above for a faster look at how Level 797 gets solved.
Video doesn't match your screen?
Game updates frequently scramble layouts! Try our AI Screenshot Solver first to find your exact board instantly, or report broken guides to our team.
Welcome back to another puzzle guide. Today we are looking at Colony Flow Level 797 and getting those ants moving. This stage gives you a massive piece of pixel art to clear and throws a few tricky mechanics your way. I played through this one a few times to find the safest route that keeps your waiting slots completely open.
Colony Flow Level 797 Overview
What You Are Working With
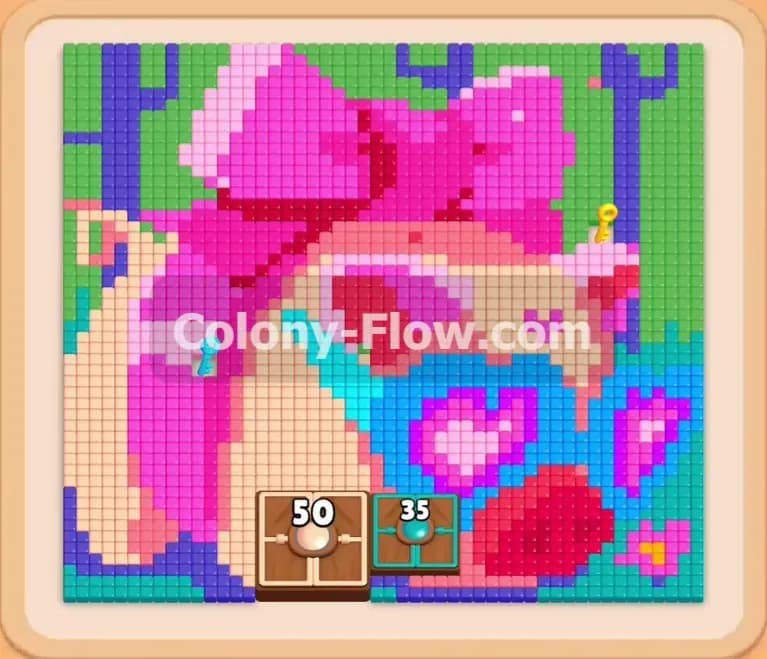
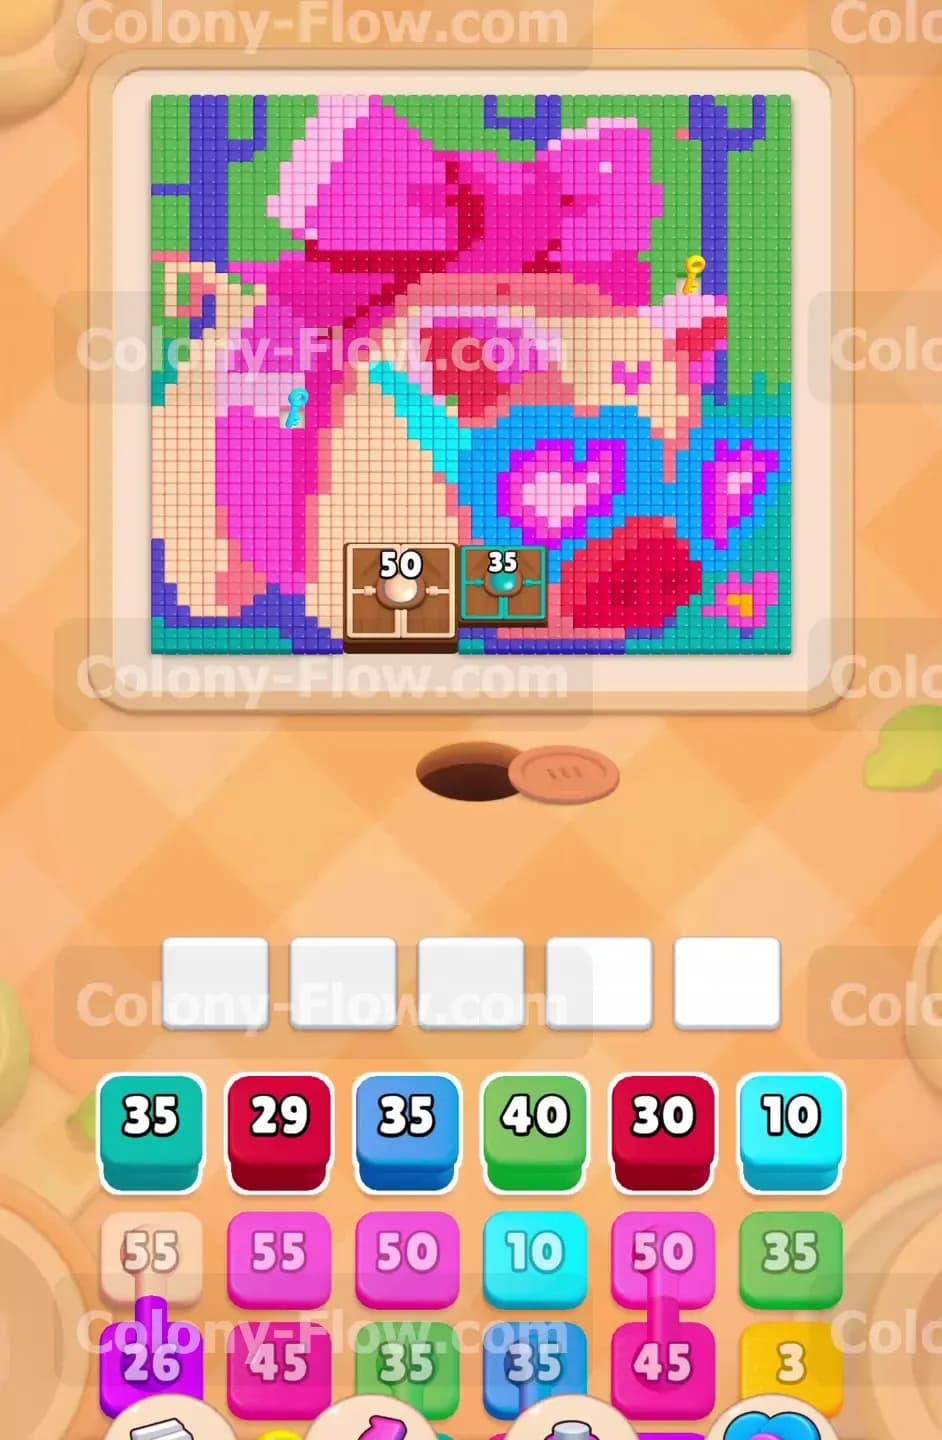
The board shows a large pixel art picture featuring a bright pink bow sitting on a beige background. Below the bow you will see a blue heart with a red center. The background includes green trees with purple trunks flanking the sides. Right in the lower middle of the puzzle sits a Hungry Door that demands 50 beige pixels and 35 cyan pixels to open. Down in your block tray you have a mix of standard single blocks and Connected Boxes that link two colors together. Later in the stage you will also encounter Hidden Boxes that disguise their true color until a path opens up.
What It Takes to Clear Level 797 Board
You win this stage when your ants consume every single pixel of the picture and the board is completely empty. The main trap is the set of five waiting slots located just above your block tray. You lose immediately if you fill all five slots and your ants have nowhere to go. Winning requires you to balance the large blocks against the available open pixels on the board. You must clear the outer edges first and feed the Hungry Door early so you can reach the center of the picture. Every single move needs to leave at least one active color on the board so the colony keeps flowing.
Colony Flow Level 797 Step by Step Solution
Step 1: Clear the outer trees and feed the Hungry Door to open the center.
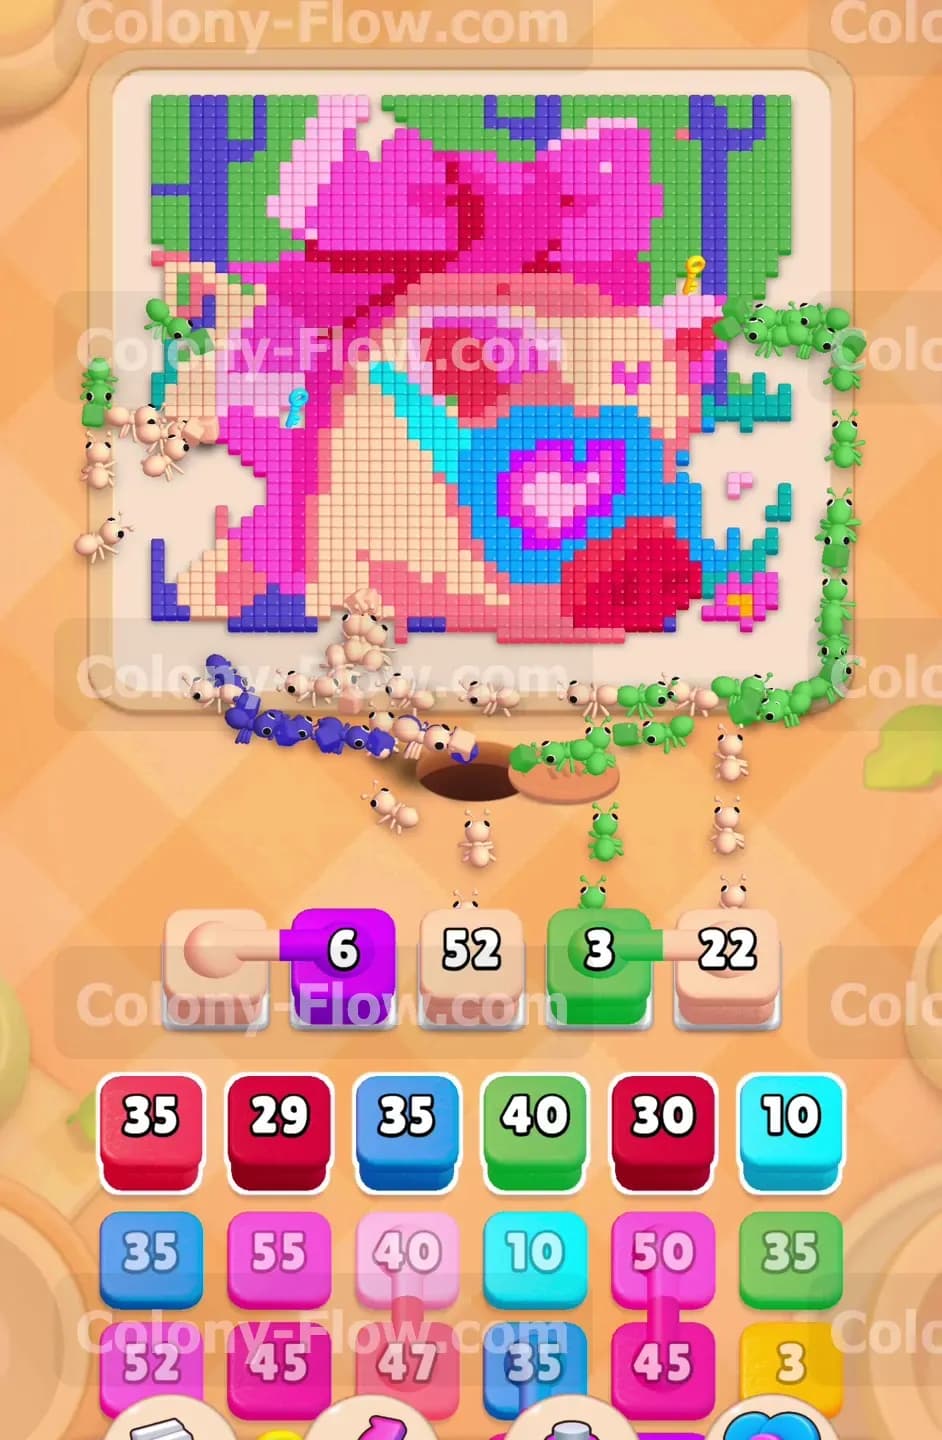
Start by focusing your attention on the green leaves and the purple tree trunks located on the far outer edges of the picture. You need to pull the green blocks and the purple blocks from the top row of your block tray to get things moving. The ants will immediately stream out of the nest hole at the bottom and travel up the left and right sides of the board to eat those outer pixels. While the ants work their way through the trees you need to address a major obstacle. Right in the bottom center of the board sits a Hungry Door that blocks your access to the lower half of the beige background. You can see it asking for specific colors before it will vanish. Pull a beige block and a cyan block from the tray to satisfy the requirements of 50 beige pixels and 35 cyan pixels. The ants will march directly into the door rather than eating the picture. Once they deliver the required amounts to the door it completely vanishes. This action opens up fresh paths for your colony and allows you to reach the center of the pixel art.
Step 2: Eat away the beige background to expose the pink bow.
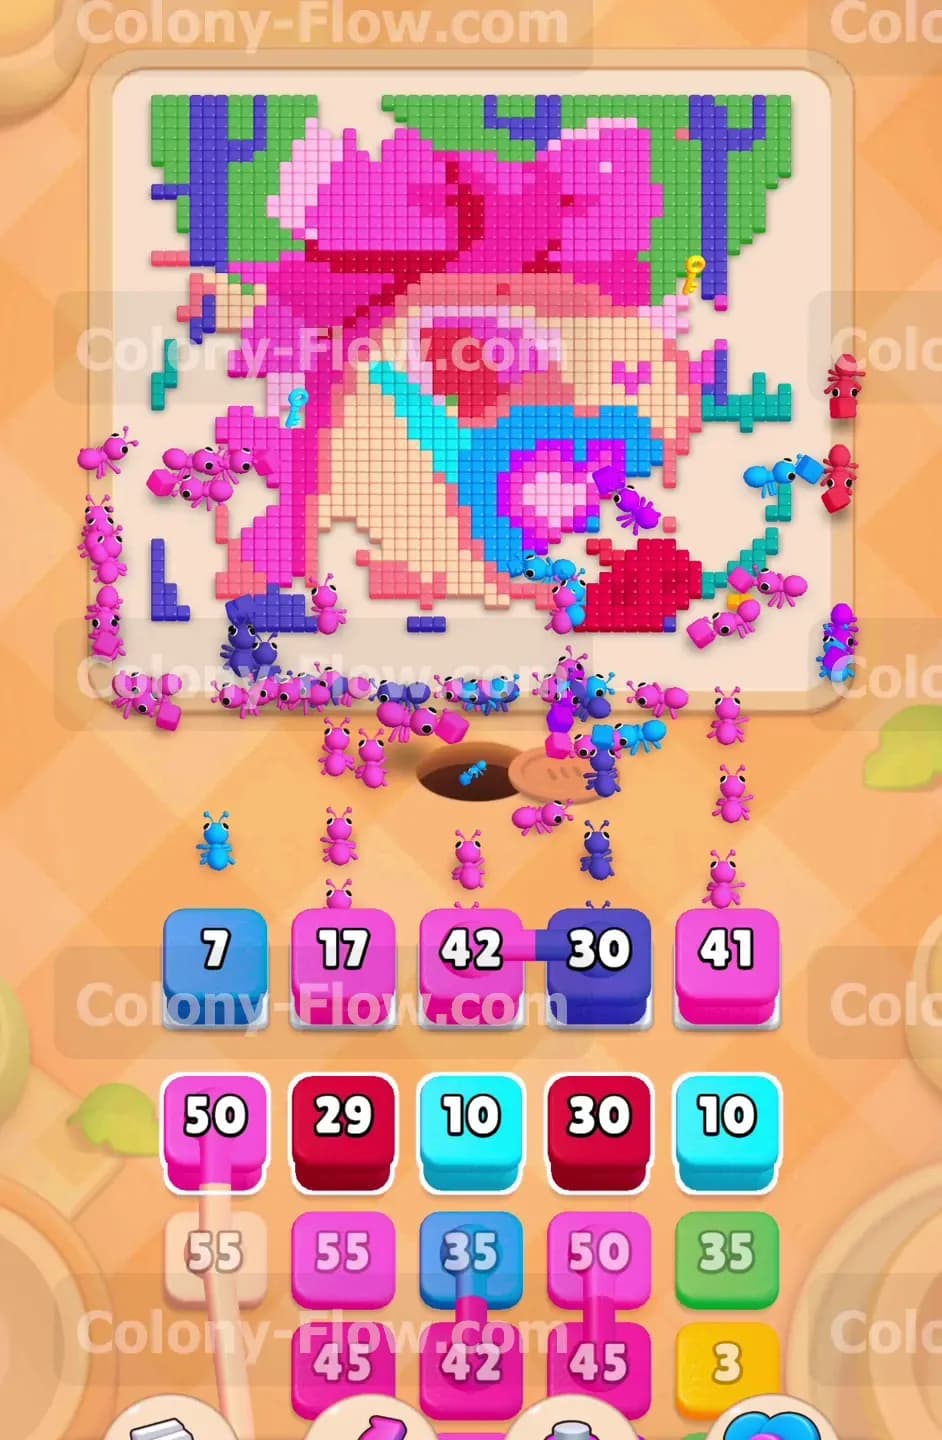
With the Hungry Door completely gone you now have a wide open path to the large beige area that surrounds the main picture. Go down to your tray and pull the large beige blocks and drop them into your waiting slots. You will see several blocks holding very high numbers like 52 and 22. Once you place these blocks into the slots the ants will flood out and start stripping away the beige background surrounding the pink bow. You can watch the numbers on the blocks physically count down as the ants consume the matching colored pixels on the board. You must keep a close eye on your five waiting slots during this exact process. Do not pull too many large blocks at the exact same time. You want to let the colony clear the current beige blocks out of the slots before you introduce a completely new color. If you fill all five slots with massive numbers the ants will run out of valid pixels to eat and you will instantly lose the stage.
Step 3: Use the Connected Boxes to tackle the pink bow.
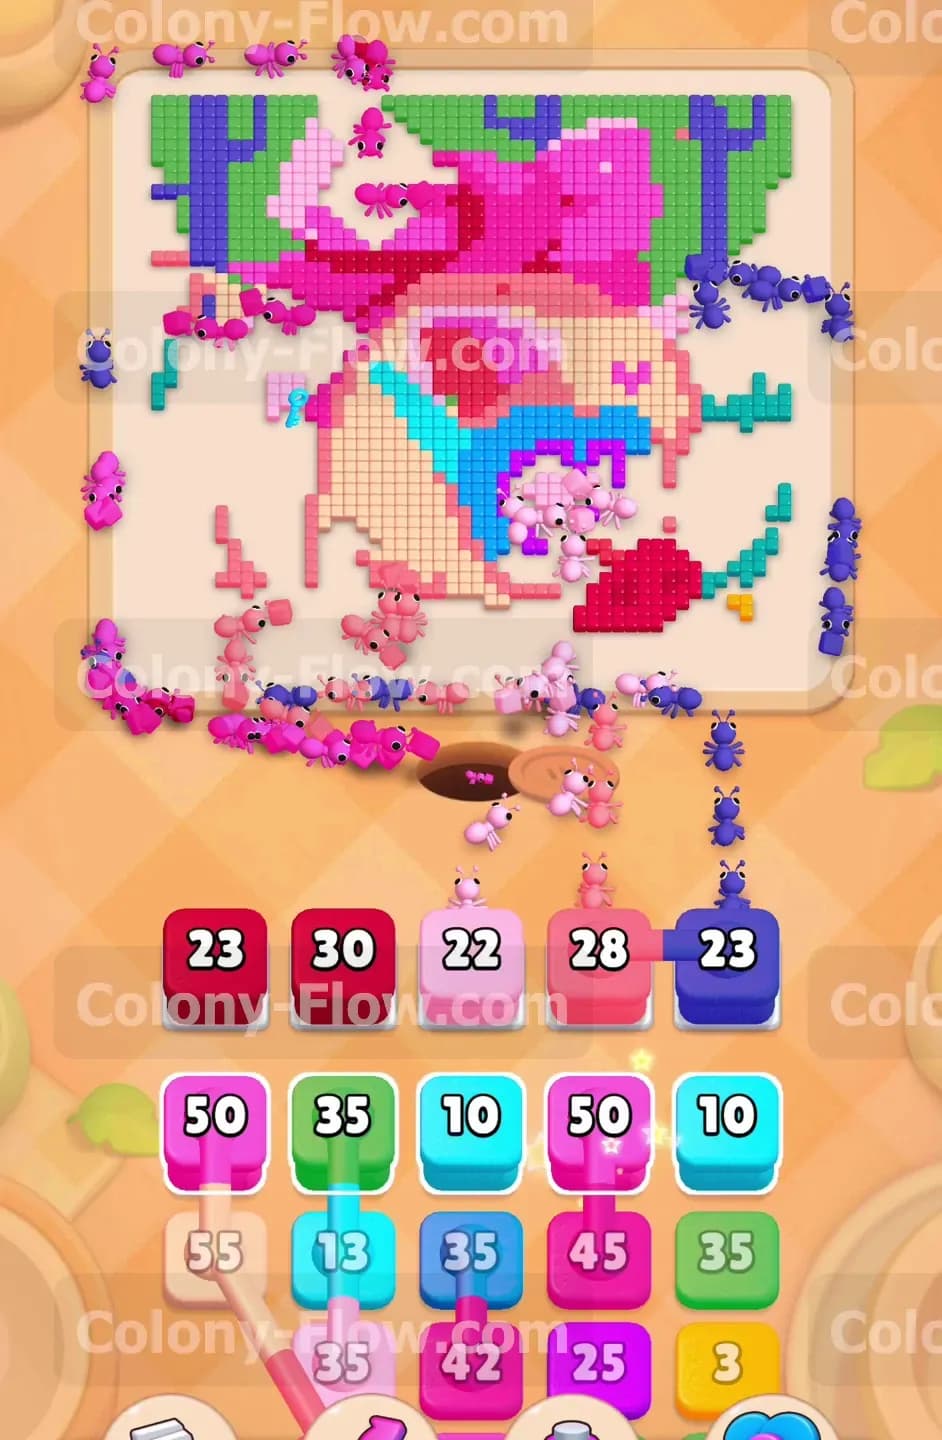
Your tray contains several pink blocks linked together which the game calls Connected Boxes. You must pull these linked blocks as a single unified item. Because they are joined together they will occupy multiple spots in your five waiting slots at the same time. You can only use these linked boxes safely when the pink bow has plenty of exposed outer edges for the ants to reach. Wait patiently until the ants finish eating enough of the beige background to leave the pink pixels totally vulnerable. Once the path is clear you can pull the pink Connected Boxes up into the active slots. The ants will split up into different groups and attack both the left side and the right side of the massive pink bow. Because the bow takes up so much space on the board the ants will easily consume all the required pink numbers without jamming your slots. This unified attack clears a huge portion of the board very quickly.
Step 4: Break into the blue heart and red center.
The lower section of the pixel art picture holds a large blue heart containing a bright red center. You need to clear the outer blue pixels first before the ants can ever reach the red ones tucked inside. Pull the blue blocks holding numbers like 30 or 35 and let the colony chip away at the solid blue outline. The ants will eat their way through the blue shell pixel by pixel. Once a gap finally opens up in the blue shape you gain direct access to the red pixels hidden inside. Now you can safely pull the dark red blocks from your tray into the waiting slots. The ants will march straight through the newly created gap and clear out the entire red center of the heart. This specific step requires patience because pulling the red block too early will trap it in a waiting slot. If the ants cannot reach the red pixels the red block will just sit there and consume valuable space.
Step 5: Reveal the Hidden Boxes and clear the remaining beige pixels.
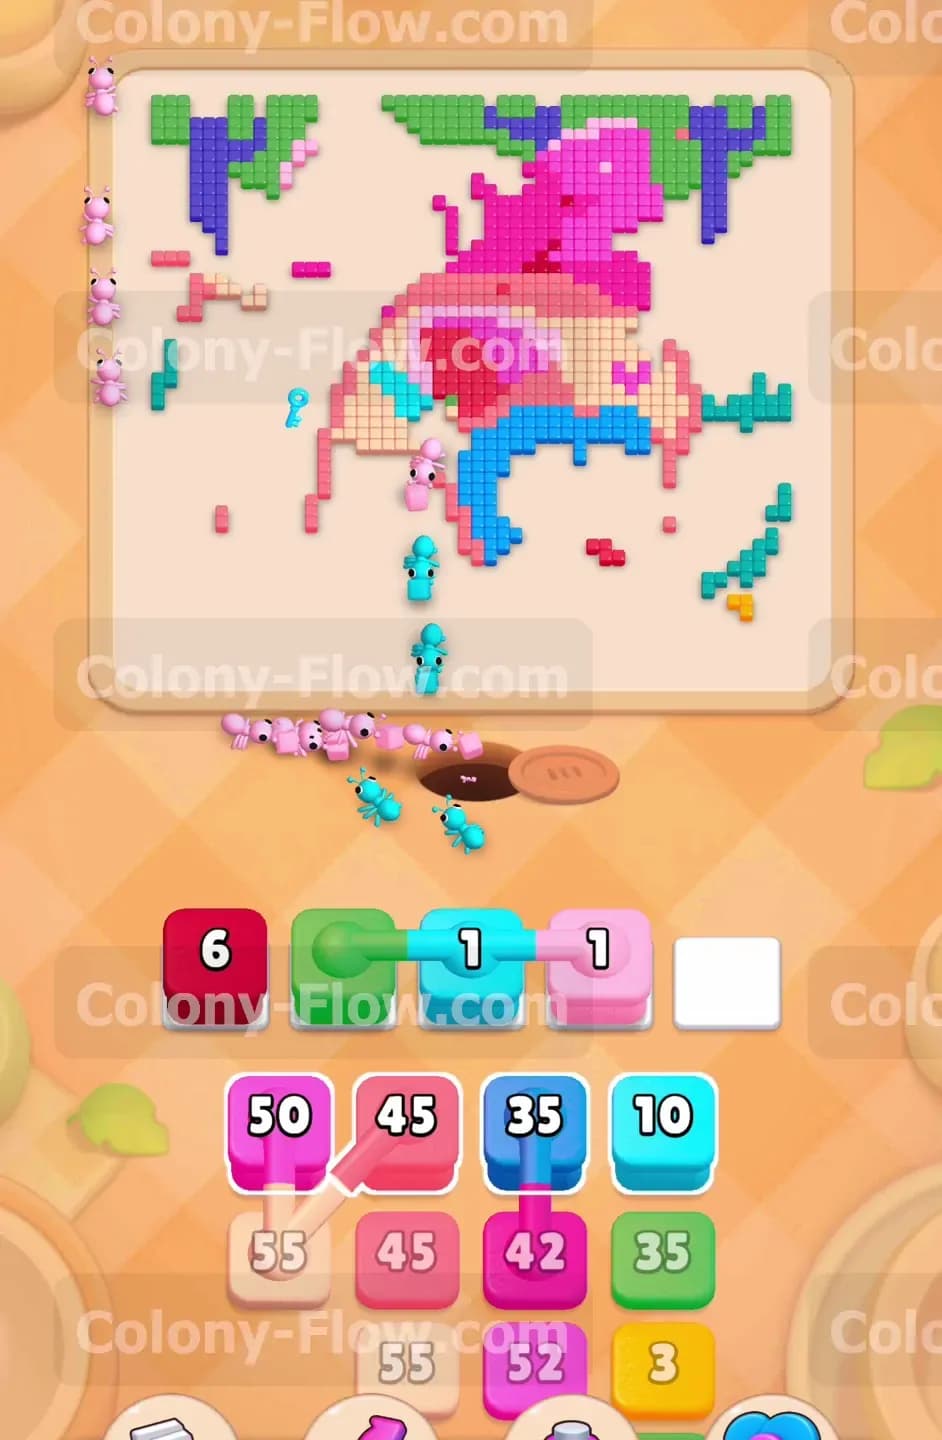
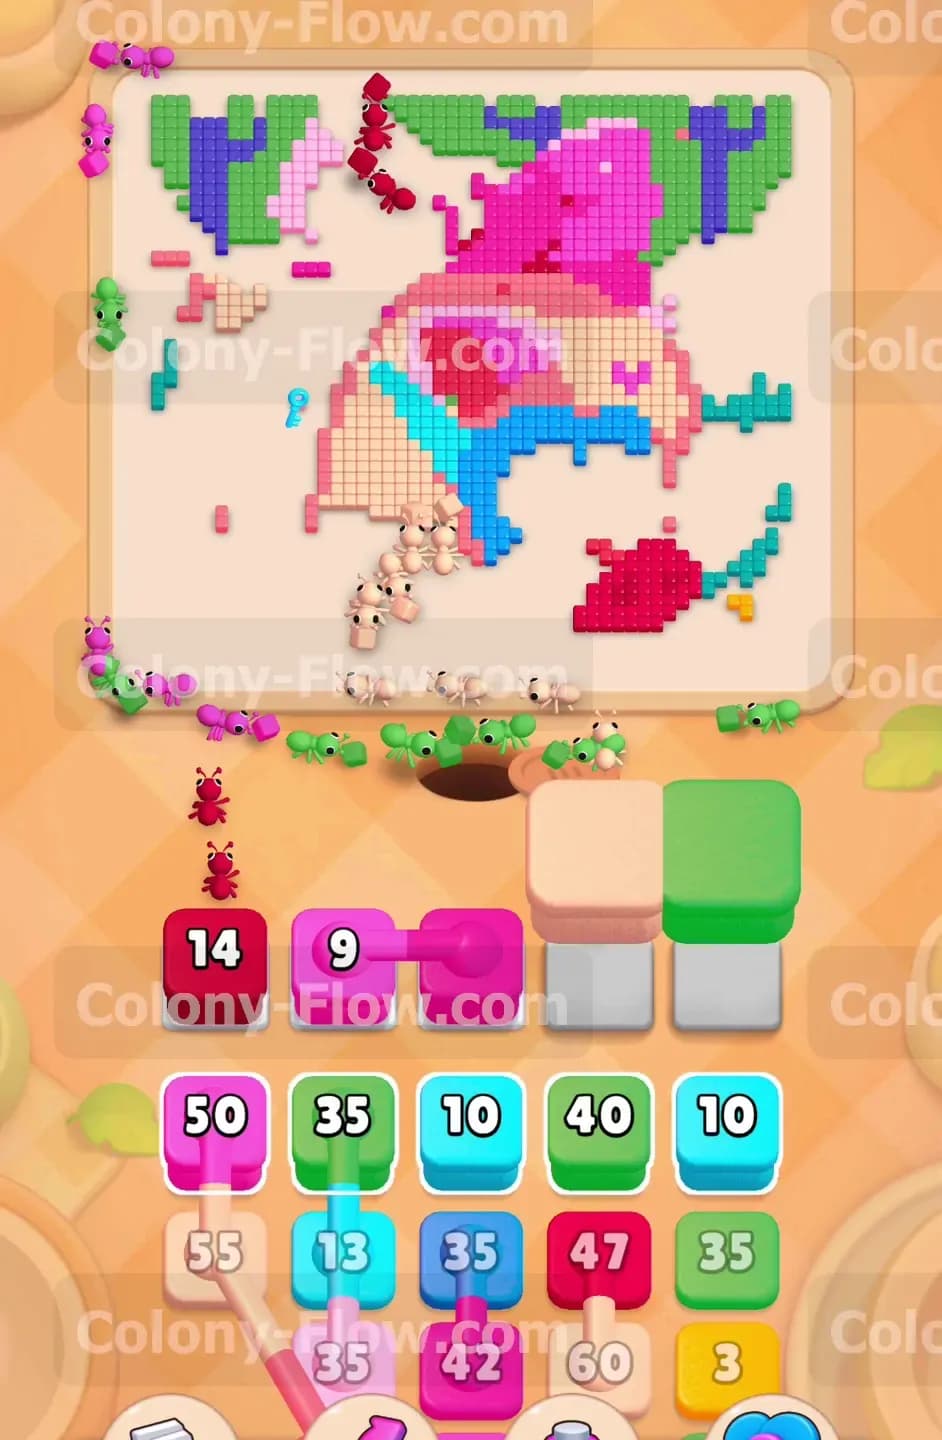
As you empty the front rows of your block tray you will eventually expose the gray Hidden Boxes. These tricky blocks keep their true colors a secret until a valid path opens up on the actual board. When the surrounding pixels clear out the Hidden Boxes reveal themselves as a beige block and a green block. You should immediately pull the newly revealed beige block into an open waiting slot to send ants after the last few beige pixels lingering on the left side of the board. Follow up that move by pulling the green block to clear the remaining leaves on the upper left tree section. Handling these Hidden Boxes quickly prevents them from cluttering the bottom of your screen. You want to get them out of the tray so they do not block your access to the final colors you need for the endgame.
Step 6: Deploy the mixed Connected Boxes to finish the upper leaves and bow.
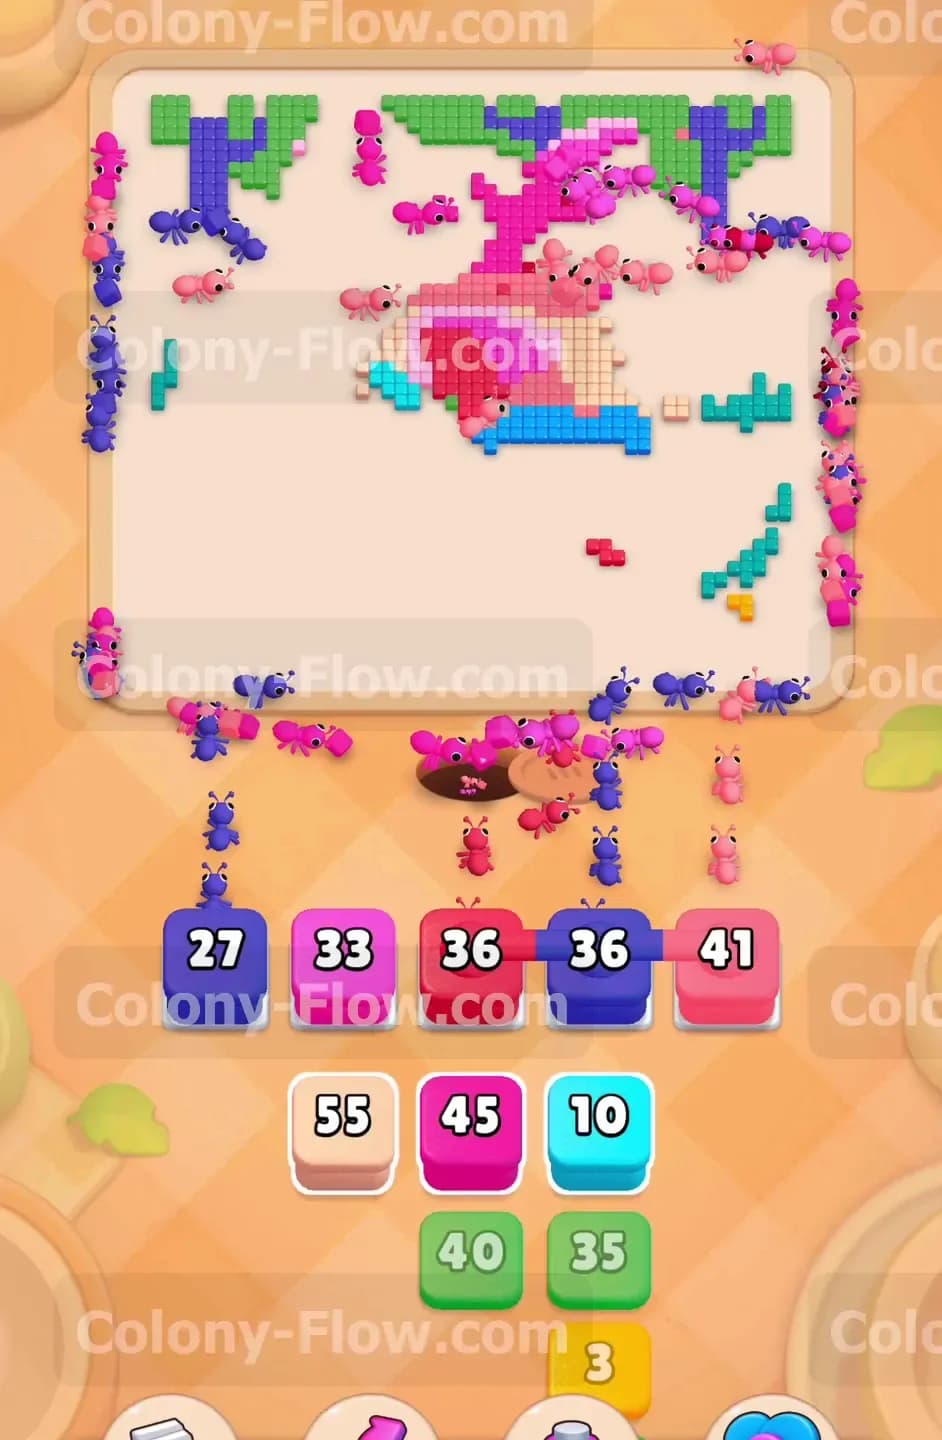
Deep in the bottom of your tray you will find another set of Connected Boxes linking a green block and a pink block together. You must make sure open paths exist for both of these colors before you even think about pulling this pair. Look closely at the very top of the board where a few green leaves and pink bow pixels still remain touching each other. Once you confirm both colors are exposed you can pull the linked green and pink blocks into your slots. The ants will flow out of the hole and handle both colors simultaneously. The green block holds a very small number while the pink block holds a much larger number. The ants will finish eating the green block quickly and then concentrate entirely on destroying the rest of the upper pink bow. Managing these mixed colors properly keeps your slots draining smoothly.
Step 7: Send massive blocks to destroy the final pieces of the pink bow.
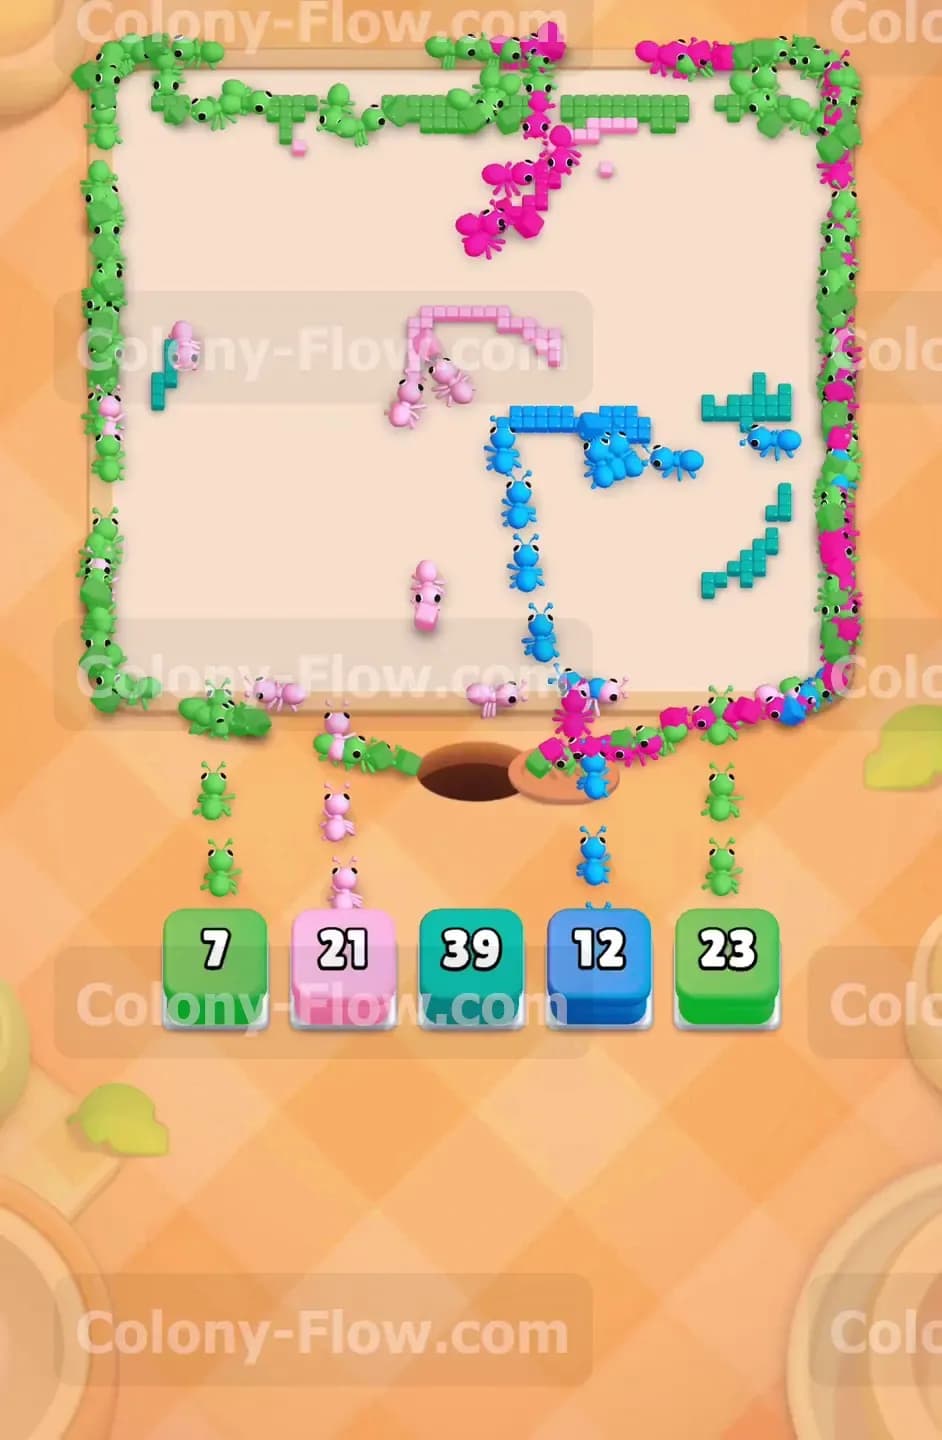
The pink bow still has a thick section remaining on the far right side of the board. Your tray has several high number pink blocks waiting for action to finish the job. Pull a pink block holding a 33 and a pink block holding a 41 into your active slots. The ants will surge out of the nest hole and swarm the entire right side of the bow. You might also have a dark purple block sitting in your tray during this phase. If you see remaining purple trunk pixels on the right edge of the trees you should pull the purple block alongside the pink ones. The ants will naturally divide their forces to hunt down their preferred colors. They will clear both the pink bow and the purple trunks without creating any traffic jams at the bottom.
Step 8: Clean up the scattered pixels to complete the picture.
The board is almost entirely empty now with just a few scattered pieces remaining. You only have a few scattered green leaves at the very top edge and some blue and cyan pixels near the bottom right corner. Your remaining tray blocks perfectly match these stragglers. Pull the small green block holding a 7 and the cyan block holding a 39. The ants will travel all the way up the board and take care of the green leaves instantly. The cyan pixels form a small curve that the ants will follow perfectly until every last piece is gone. Finally you can pull your last blue block to clean up the remnants of the heart. Once the final blue pixel disappears from the screen the board flashes empty and you secure your complete victory.
Final Thought
That is everything you need to know to conquer this stage without jamming your slots. Taking your time with the Connected Boxes and the Hungry Door makes all the difference in keeping your colony moving smoothly. If any specific move feels hard to visualize in text I highly encourage you to watch the video above this article. Seeing the ants pathfind in real time makes it much easier to copy the strategy and claim your win.